Deploy a Cluster
This tutorial will teach you how to deploy a host cluster with Palette using VMware vSphere and a Private Cloud Gateway (PCG). You will learn about Cluster Mode and Cluster Profiles and how these components enable you to deploy customized applications to Kubernetes with minimal effort.
As you navigate the tutorial, refer to this diagram to help you understand how Palette uses a cluster profile as a blueprint for the host cluster you deploy. Palette clusters have the same node pools you may be familiar with: control plane nodes and worker nodes where you will deploy applications. The result is a host cluster that Palette manages. The concepts you learn about in the Getting Started section are centered around a fictional case study company, Spacetastic Ltd.
🧑🚀 Back at Spacetastic HQ
After successfully creating their first cluster profile and mapping out their entire technology stack, Wren, Founding Engineer and Kai, Platform Engineer, continue their Palette onboarding process. They are evaluating Palette as a potential platform orchestration tool for all the production workloads at Spacetastic, who provide an astronomy education platform deployed on Kubernetes.
"The Getting Started section is a great way to learn about Palette. The hands-on approach is just what we need to get our first cluster deployed." says Kai, scrolling through the Spectro Cloud Docs. "Wren, do you have time to continue our onboarding and get our first cluster deployed?"
Wren sits down next to Kai and sips on a cup of coffee. "Now, we'll get a hands-on feel of the Palette developer experience. You know me, I'm a champion for developer tooling and always supportive of investing in our platform. Let's follow this tutorial and deploy a cluster using the Palette UI."
Prerequisites
To complete this tutorial, you will need the following.
-
Follow the steps described in the Set up Palette with VMware guide to authenticate Palette for use with your VMware user account.
-
A successfully deployed PCG. Follow the steps described in the Deploy a PCG with Palette CLI tutorial to deploy a PCG using the Palette CLI.
-
A Palette cluster profile. Follow the Create a Cluster Profile tutorial to create the required VMware cluster profile.
Deploy a Cluster
The following steps will guide you through deploying the cluster infrastructure.
Navigate to the left Main Menu and select Clusters. Click on Create Cluster.

Palette will prompt you to select the type of cluster. Select VMware and click the Start VMware Configuration button. Use the following steps to create a host cluster in VMware.
In the Basic Information section, insert the general information about the cluster, such as the Cluster name, Description and Tags.
Select the VMware cloud account that was registered with Palette during the PCG creation. The cloud account has the same
name as the PCG. In this tutorial, the cloud account is called gateway-tutorial.
Click on Next.
Click on Add Cluster Profile. A list is displayed of available profiles you can choose to deploy to VMware. Select the cluster profile you created in the Create a Cluster Profile tutorial, named vmware-profile, and click on Confirm.
The Cluster Profile section displays all the layers in the cluster profile.
Each layer has a pack manifest file with the deploy configurations. The pack manifest file is in a YAML format. Each pack contains a set of default values. You can change the manifest values if needed. Click on Next to proceed.
The Cluster Config section allows you to provide specific information about your VMware vSphere environment. First, select the Datacenter and Deployment Folder where the cluster nodes will be launched. Next, select the Image Template Folder to which the Spectro templates are imported, and choose DHCP as the Network Type. Finally, provide the SSH key for accessing the cluster nodes. Proceed by clicking Next to advance to the Nodes Configuration section.
The Nodes Config section allows you to configure the nodes that make up the control plane and worker nodes of the host cluster.
Provide the details for the nodes of the control plane and worker pools.
| Field | Control Plane Pool | Worker Pool |
|---|---|---|
| Node pool name | control-plane-pool | worker-pool |
| Number of nodes in the pool | 1 | 1 |
| Allow worker capability | No | Not applicable |
| Enable Autoscaler | Not applicable | No |
| Rolling update | Not applicable | Expand First |
Keep the Cloud Configuration settings the same for both pools, with CPU set to 4 cores, memory allocated at 8 GB, and disk space at 60 GB. Next, populate the Compute cluster, Resource Pool, Datastore, and Network fields according to your VMware vSphere environment. Click Next to proceed.
Select Next to proceed with the cluster deployment.
The Cluster Settings section offers advanced options for OS patching, scheduled scans, scheduled backups, and cluster role binding. For this tutorial, you can use the default settings. Click on Validate to continue.
The Review section allows you to review the cluster configuration before deploying the cluster. Review all the settings and click on Finish Configuration to deploy the cluster.
Navigate to the left Main Menu and select Clusters.
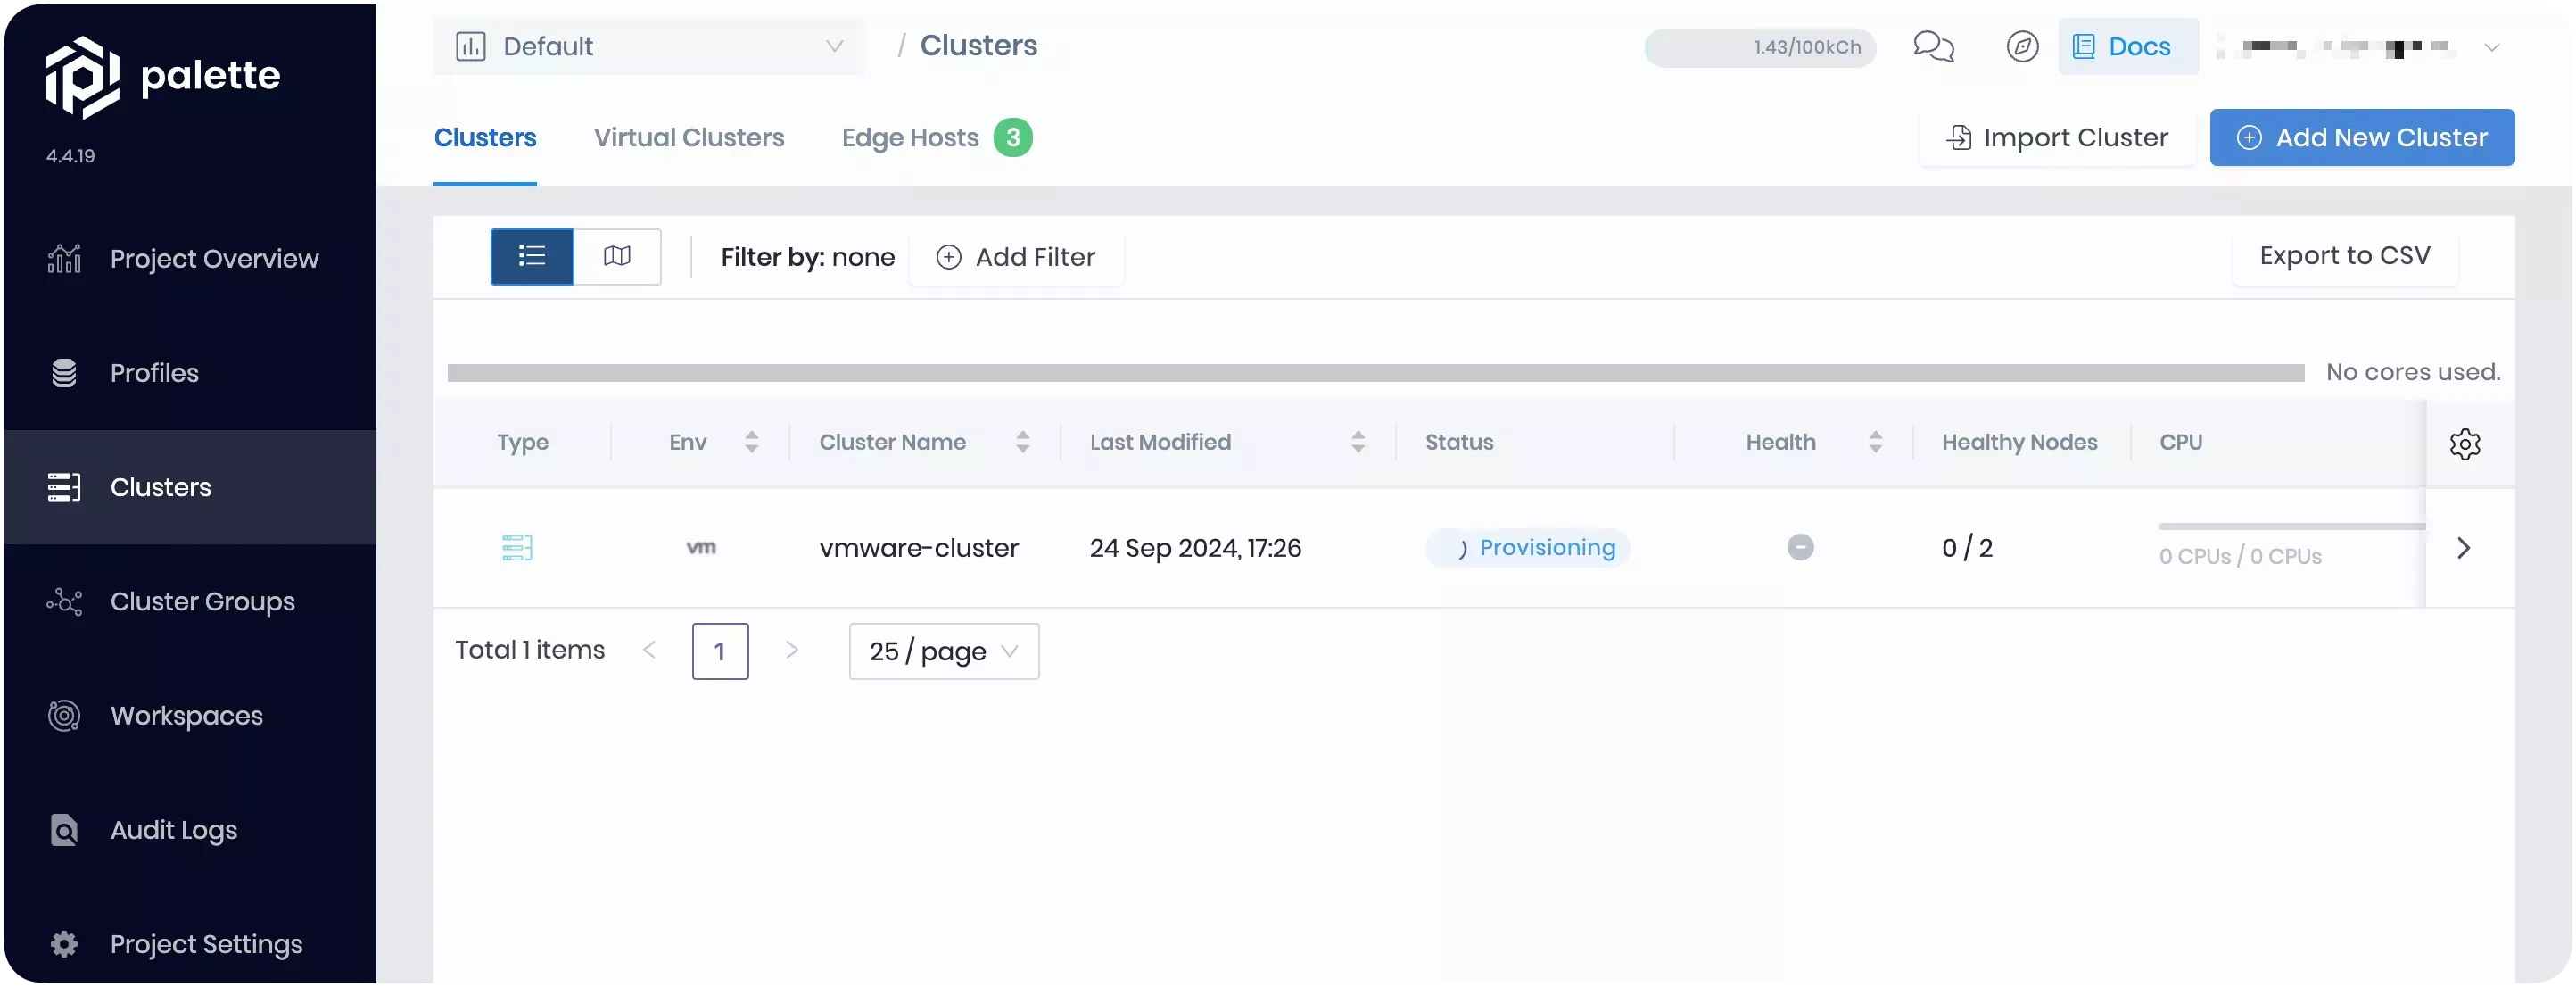
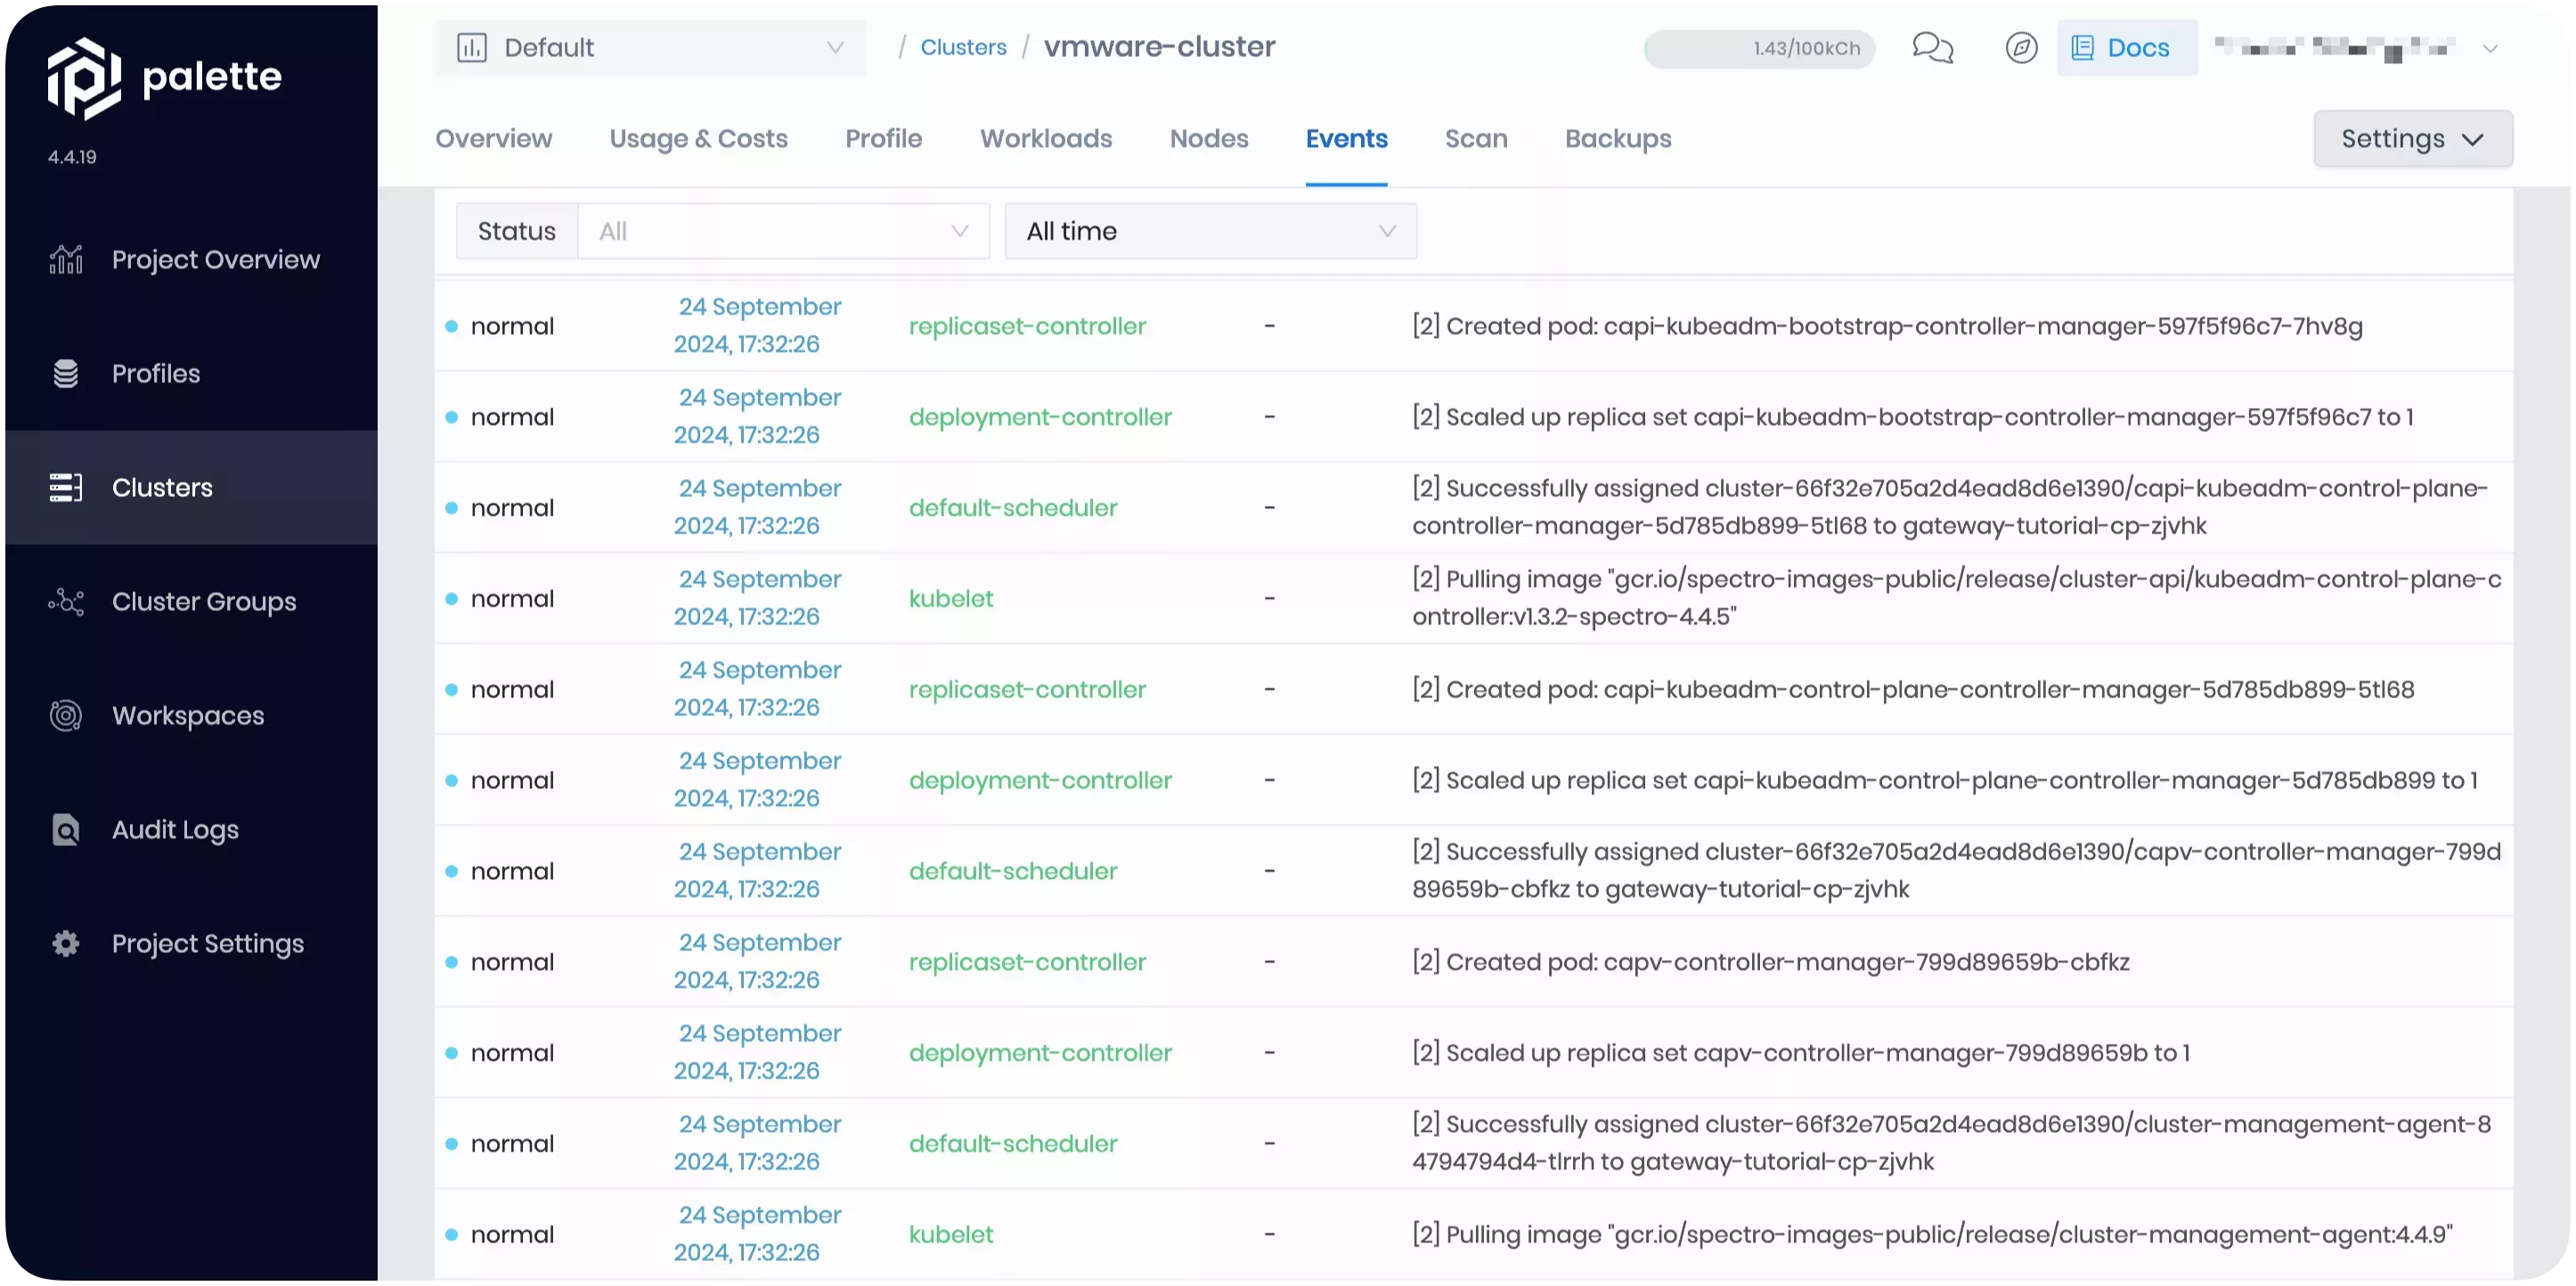
The cluster deployment process can take 15 to 30 min. The deployment time varies depending on the cloud provider, cluster profile, cluster size, and the node pool configurations provided. You can learn more about the deployment progress by reviewing the event log. Click on the Events tab to view the log.
Verify the Application
Navigate to the left Main Menu and select Clusters.
Select your cluster to view its Overview tab. When the application is deployed and ready for network traffic, indicated in the Services field, Palette exposes the service URL. Click on the URL for port :8080 to access the Hello Universe application.
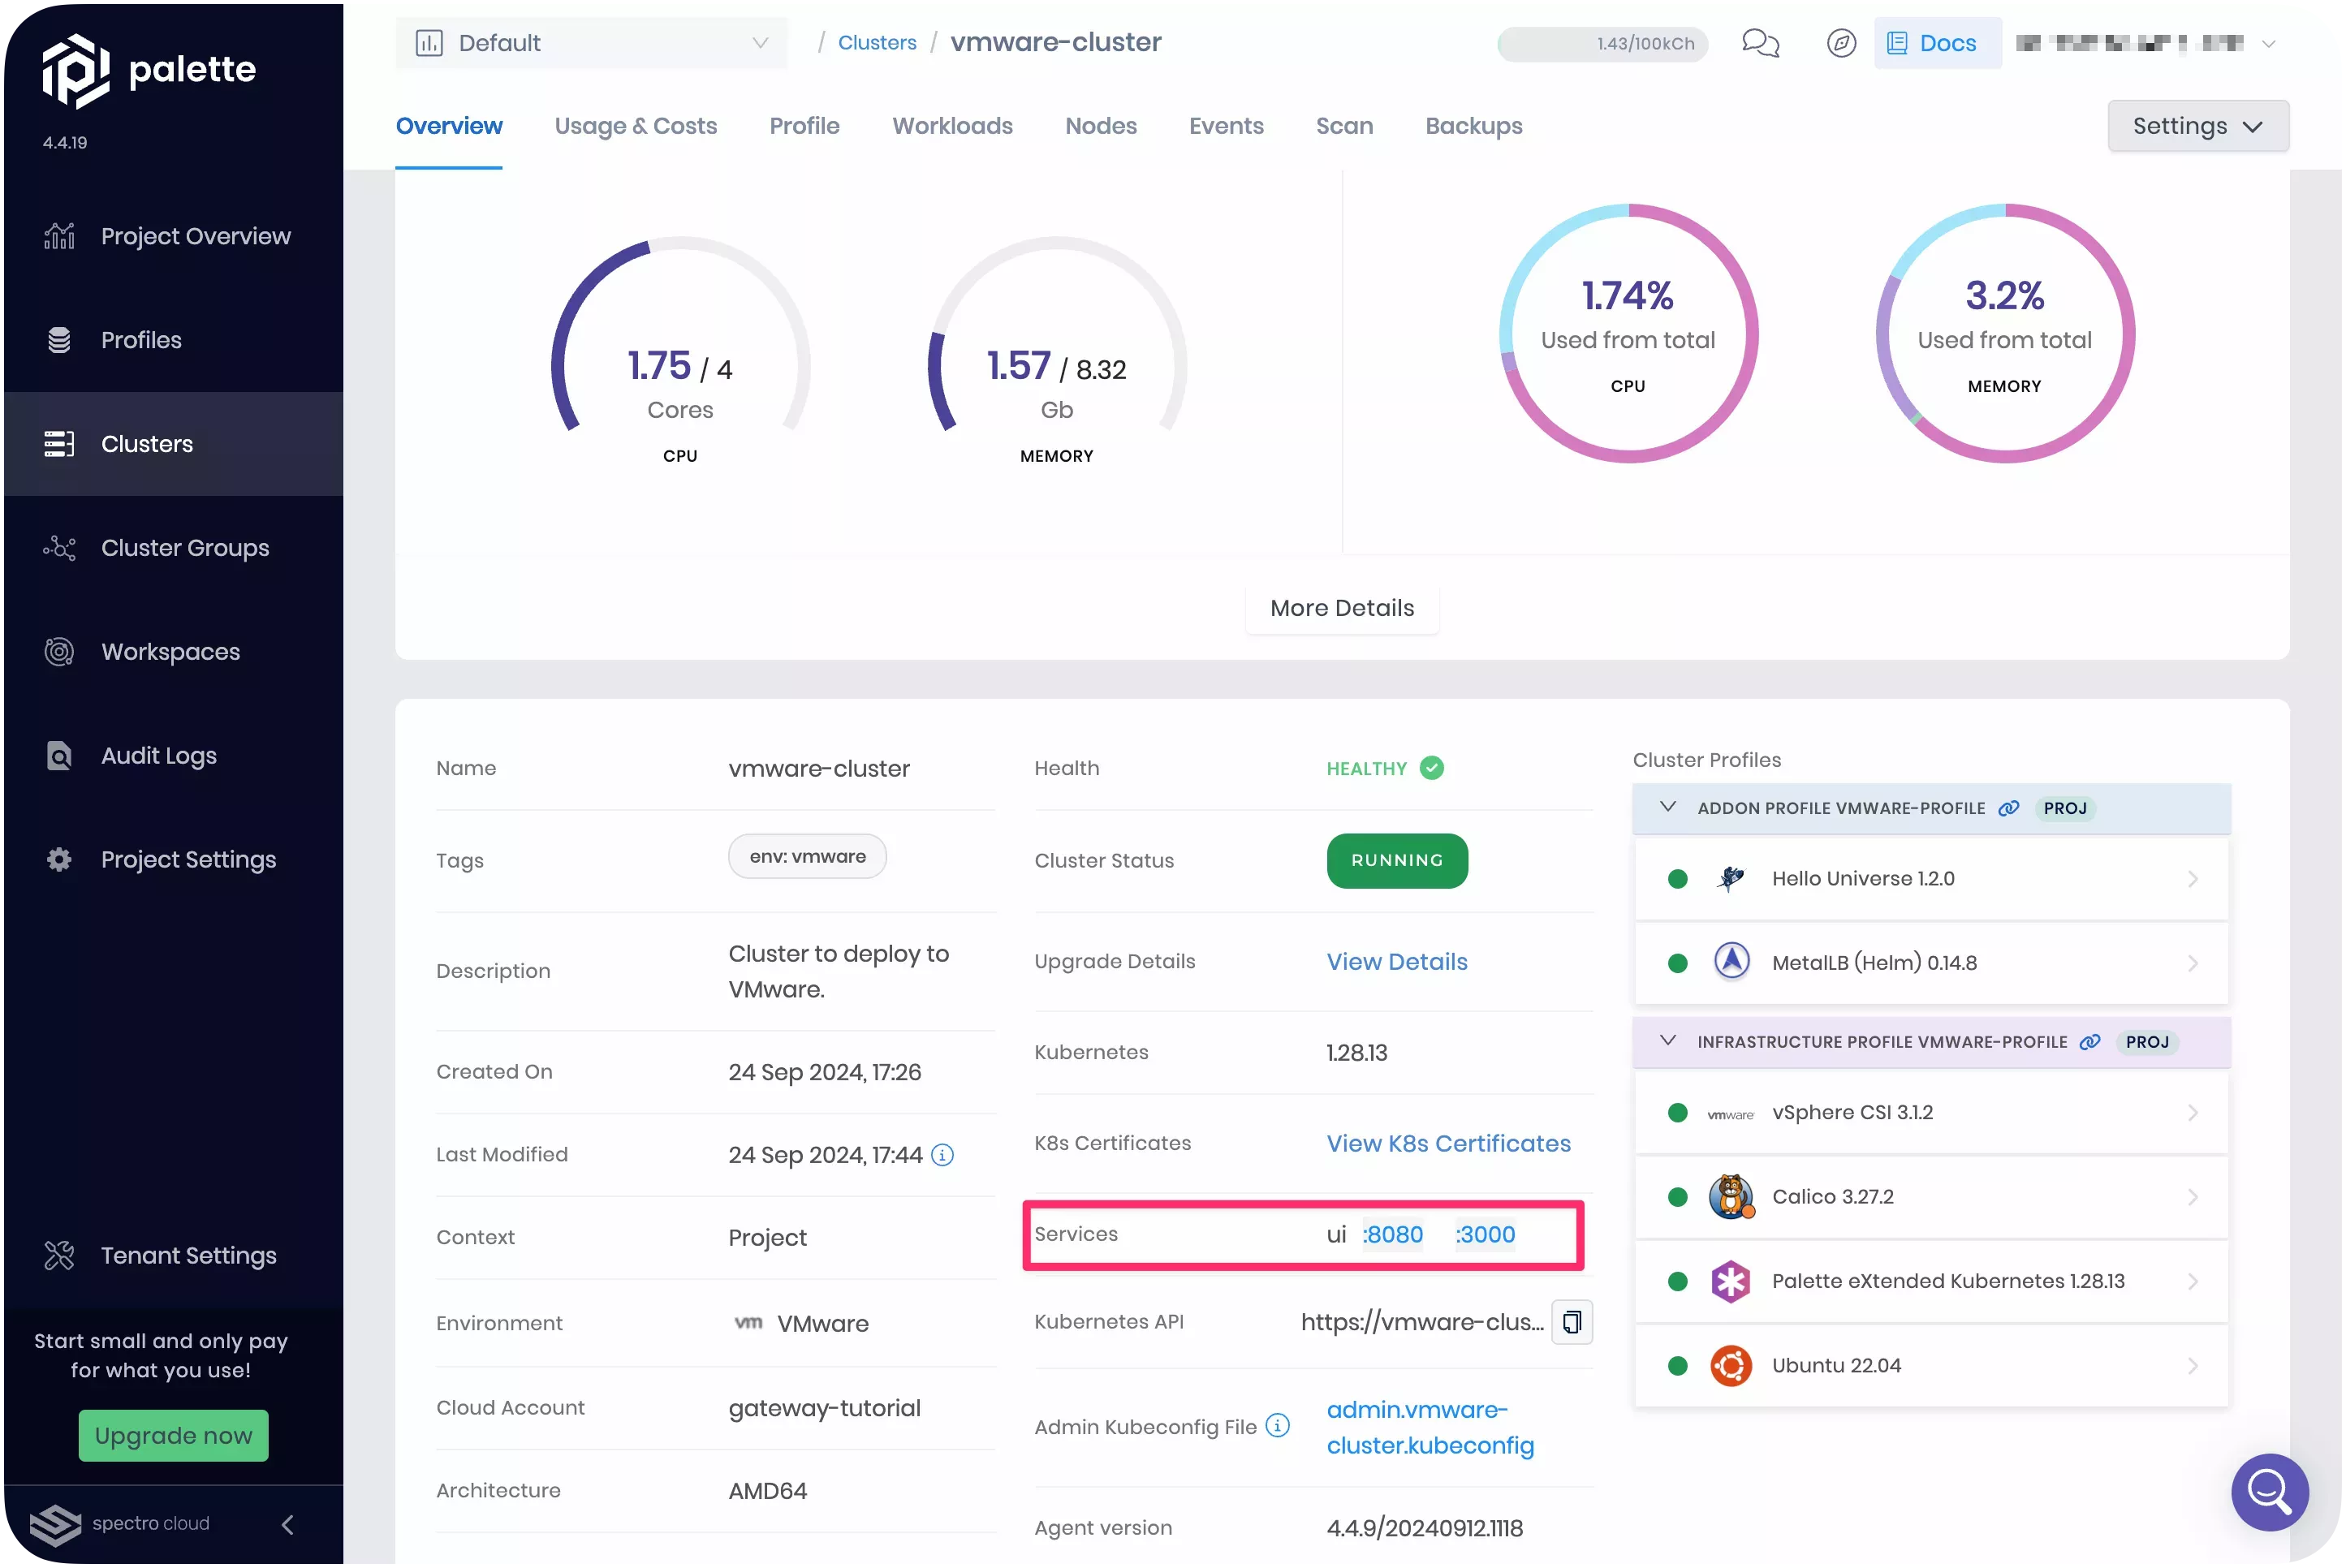
It can take up to three minutes for DNS to properly resolve the public load balancer URL. We recommend waiting a few moments before clicking on the service URL to prevent the browser from caching an unresolved DNS request.

Welcome to Spacetastic's astronomy education platform. Feel free to explore the pages and learn more about space. The statistics page offers information on visitor counts on your deployed service.
You have deployed your first application to a cluster managed by Palette. Your first application is a three-tier application with a frontend, API server, and Postgres database.
Cleanup
Use the following steps to remove all the resources you created for the tutorial.
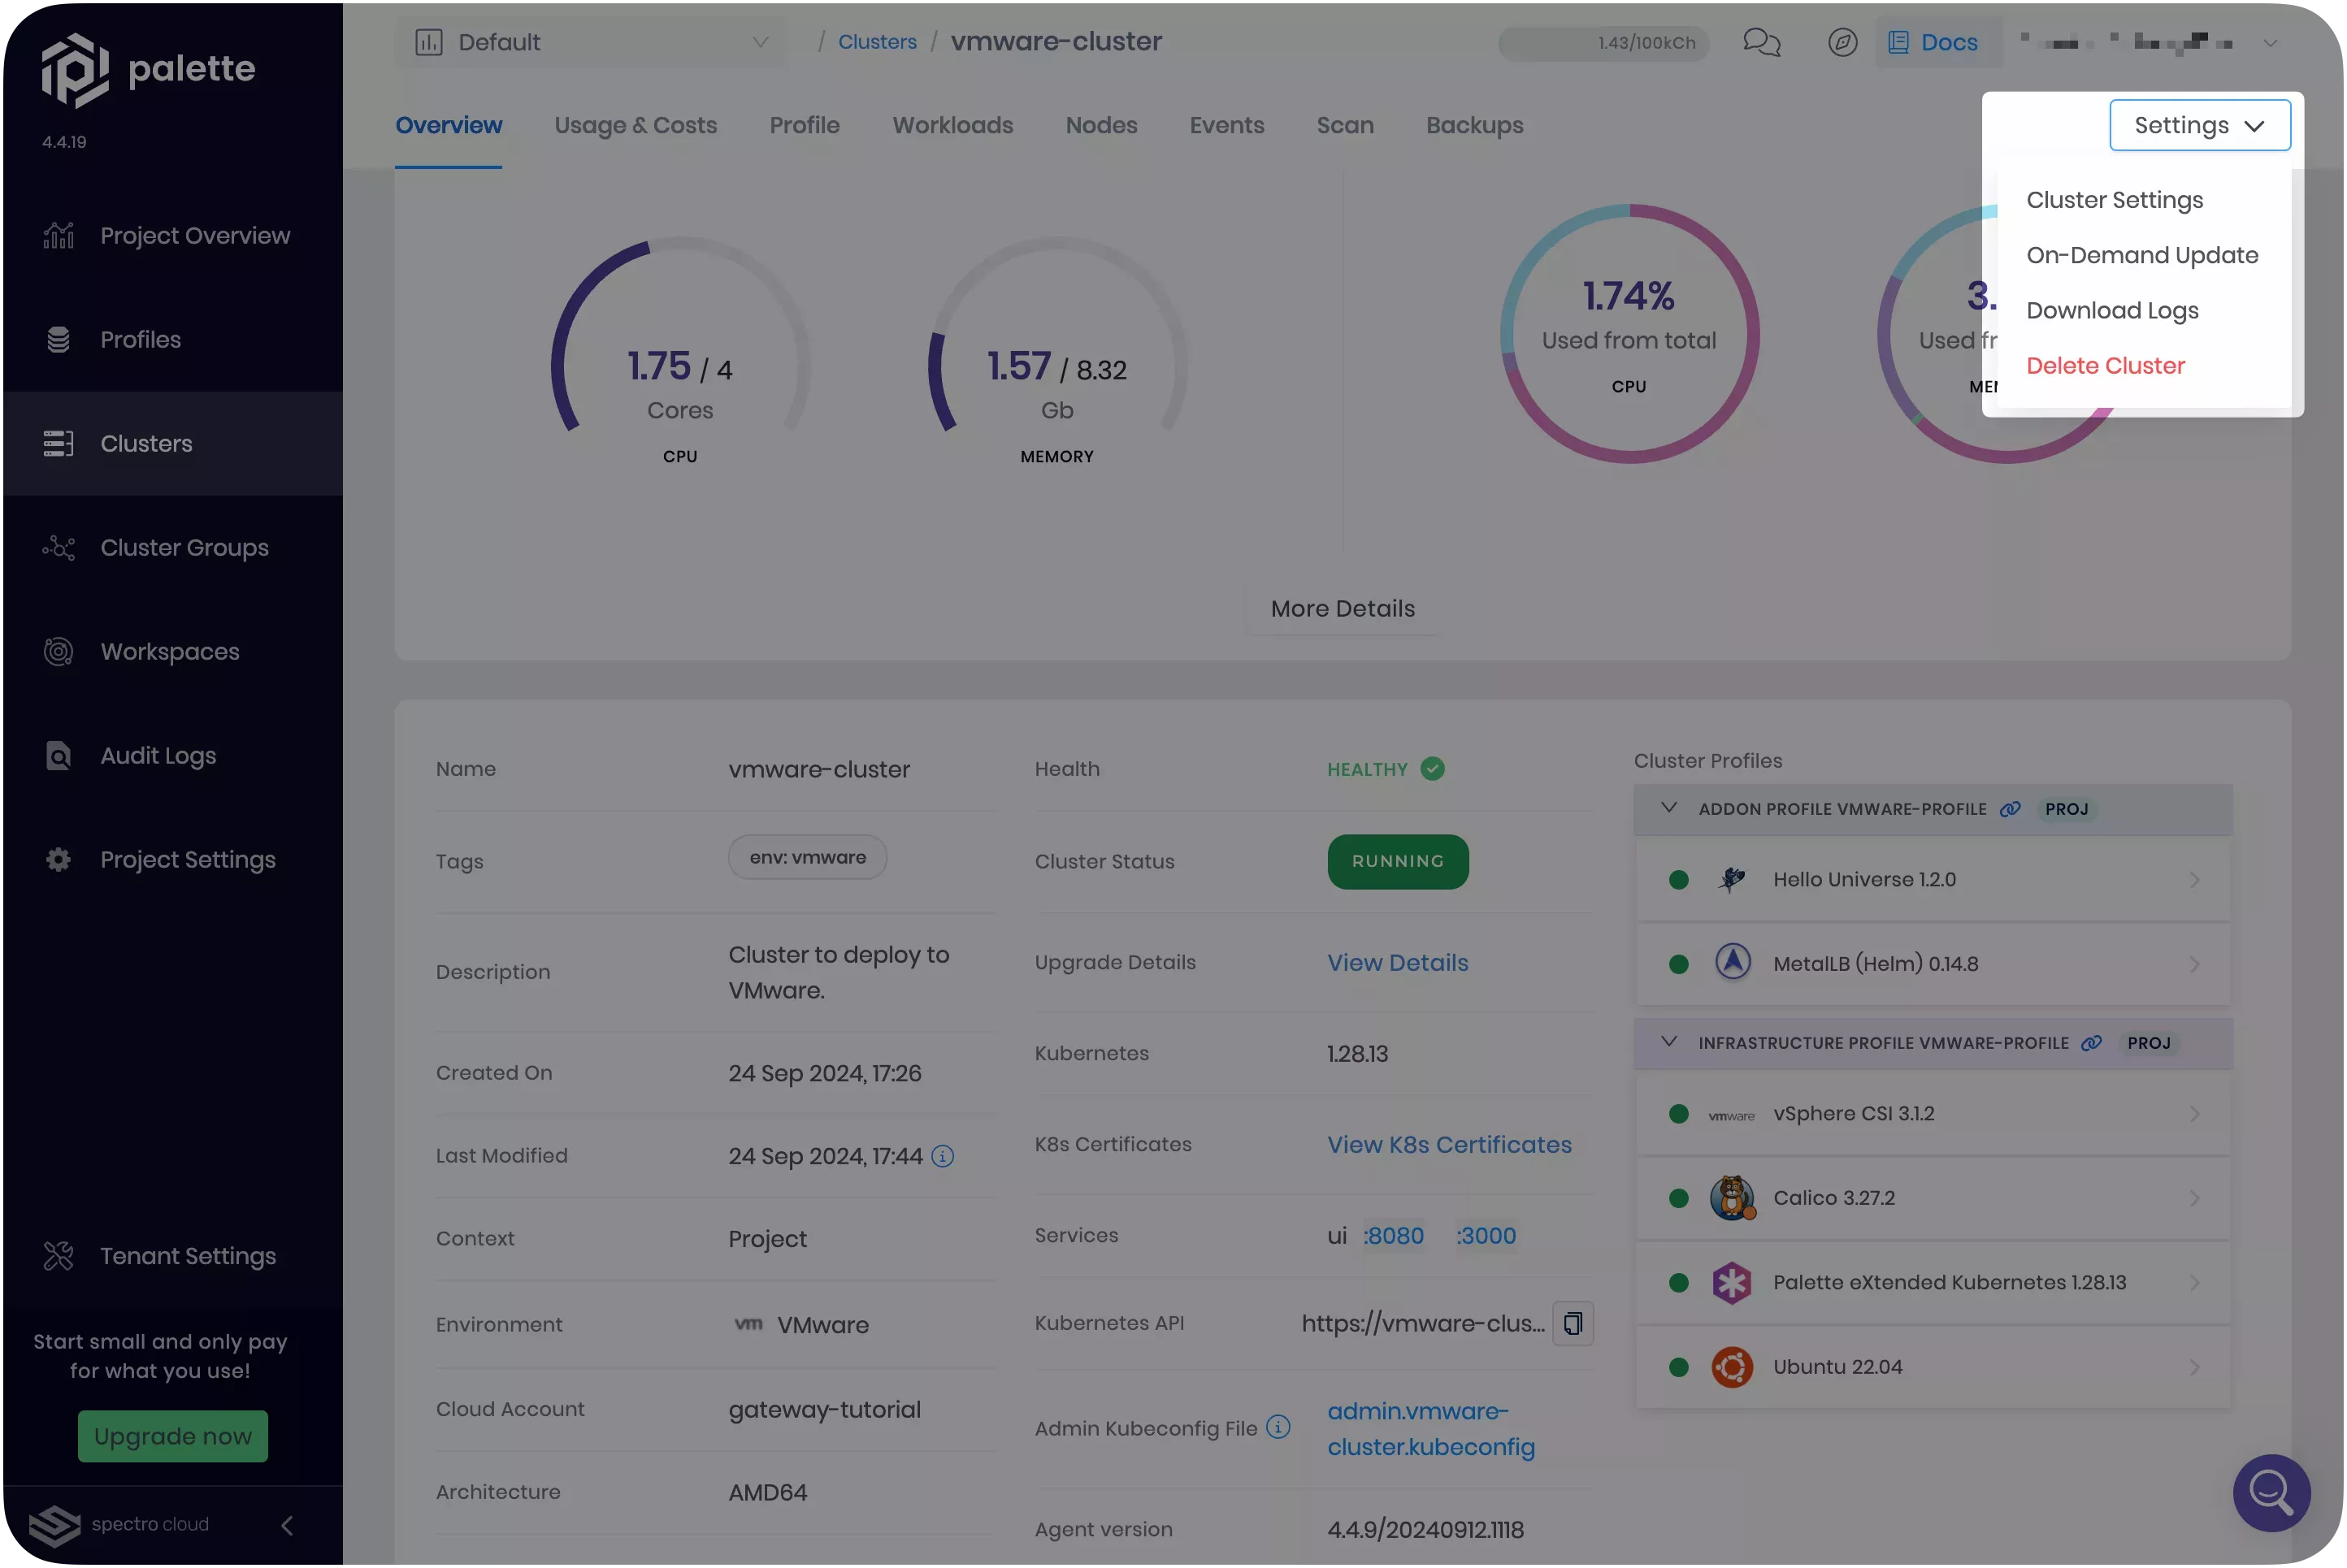
To remove the cluster, navigate to the left Main Menu and click on Clusters. Select the cluster you want to delete to access its details page.
Click on Settings to expand the menu, and select Delete Cluster.
You will be prompted to type in the cluster name to confirm the delete action. Type in the cluster name to proceed with the delete step. The deletion process takes several minutes to complete.
If a cluster remains in the delete phase for over 15 minutes, it becomes eligible for a force delete. To trigger a force delete, navigate to the cluster’s details page, click on Settings, then select Force Delete Cluster. Palette automatically removes clusters stuck in the cluster deletion phase for over 24 hours.
Once the cluster is deleted, navigate to the left Main Menu and click on Profiles. Find the cluster profile you created and click on the three-dot Menu to display the Delete button. Select Delete and confirm the selection to remove the cluster profile.
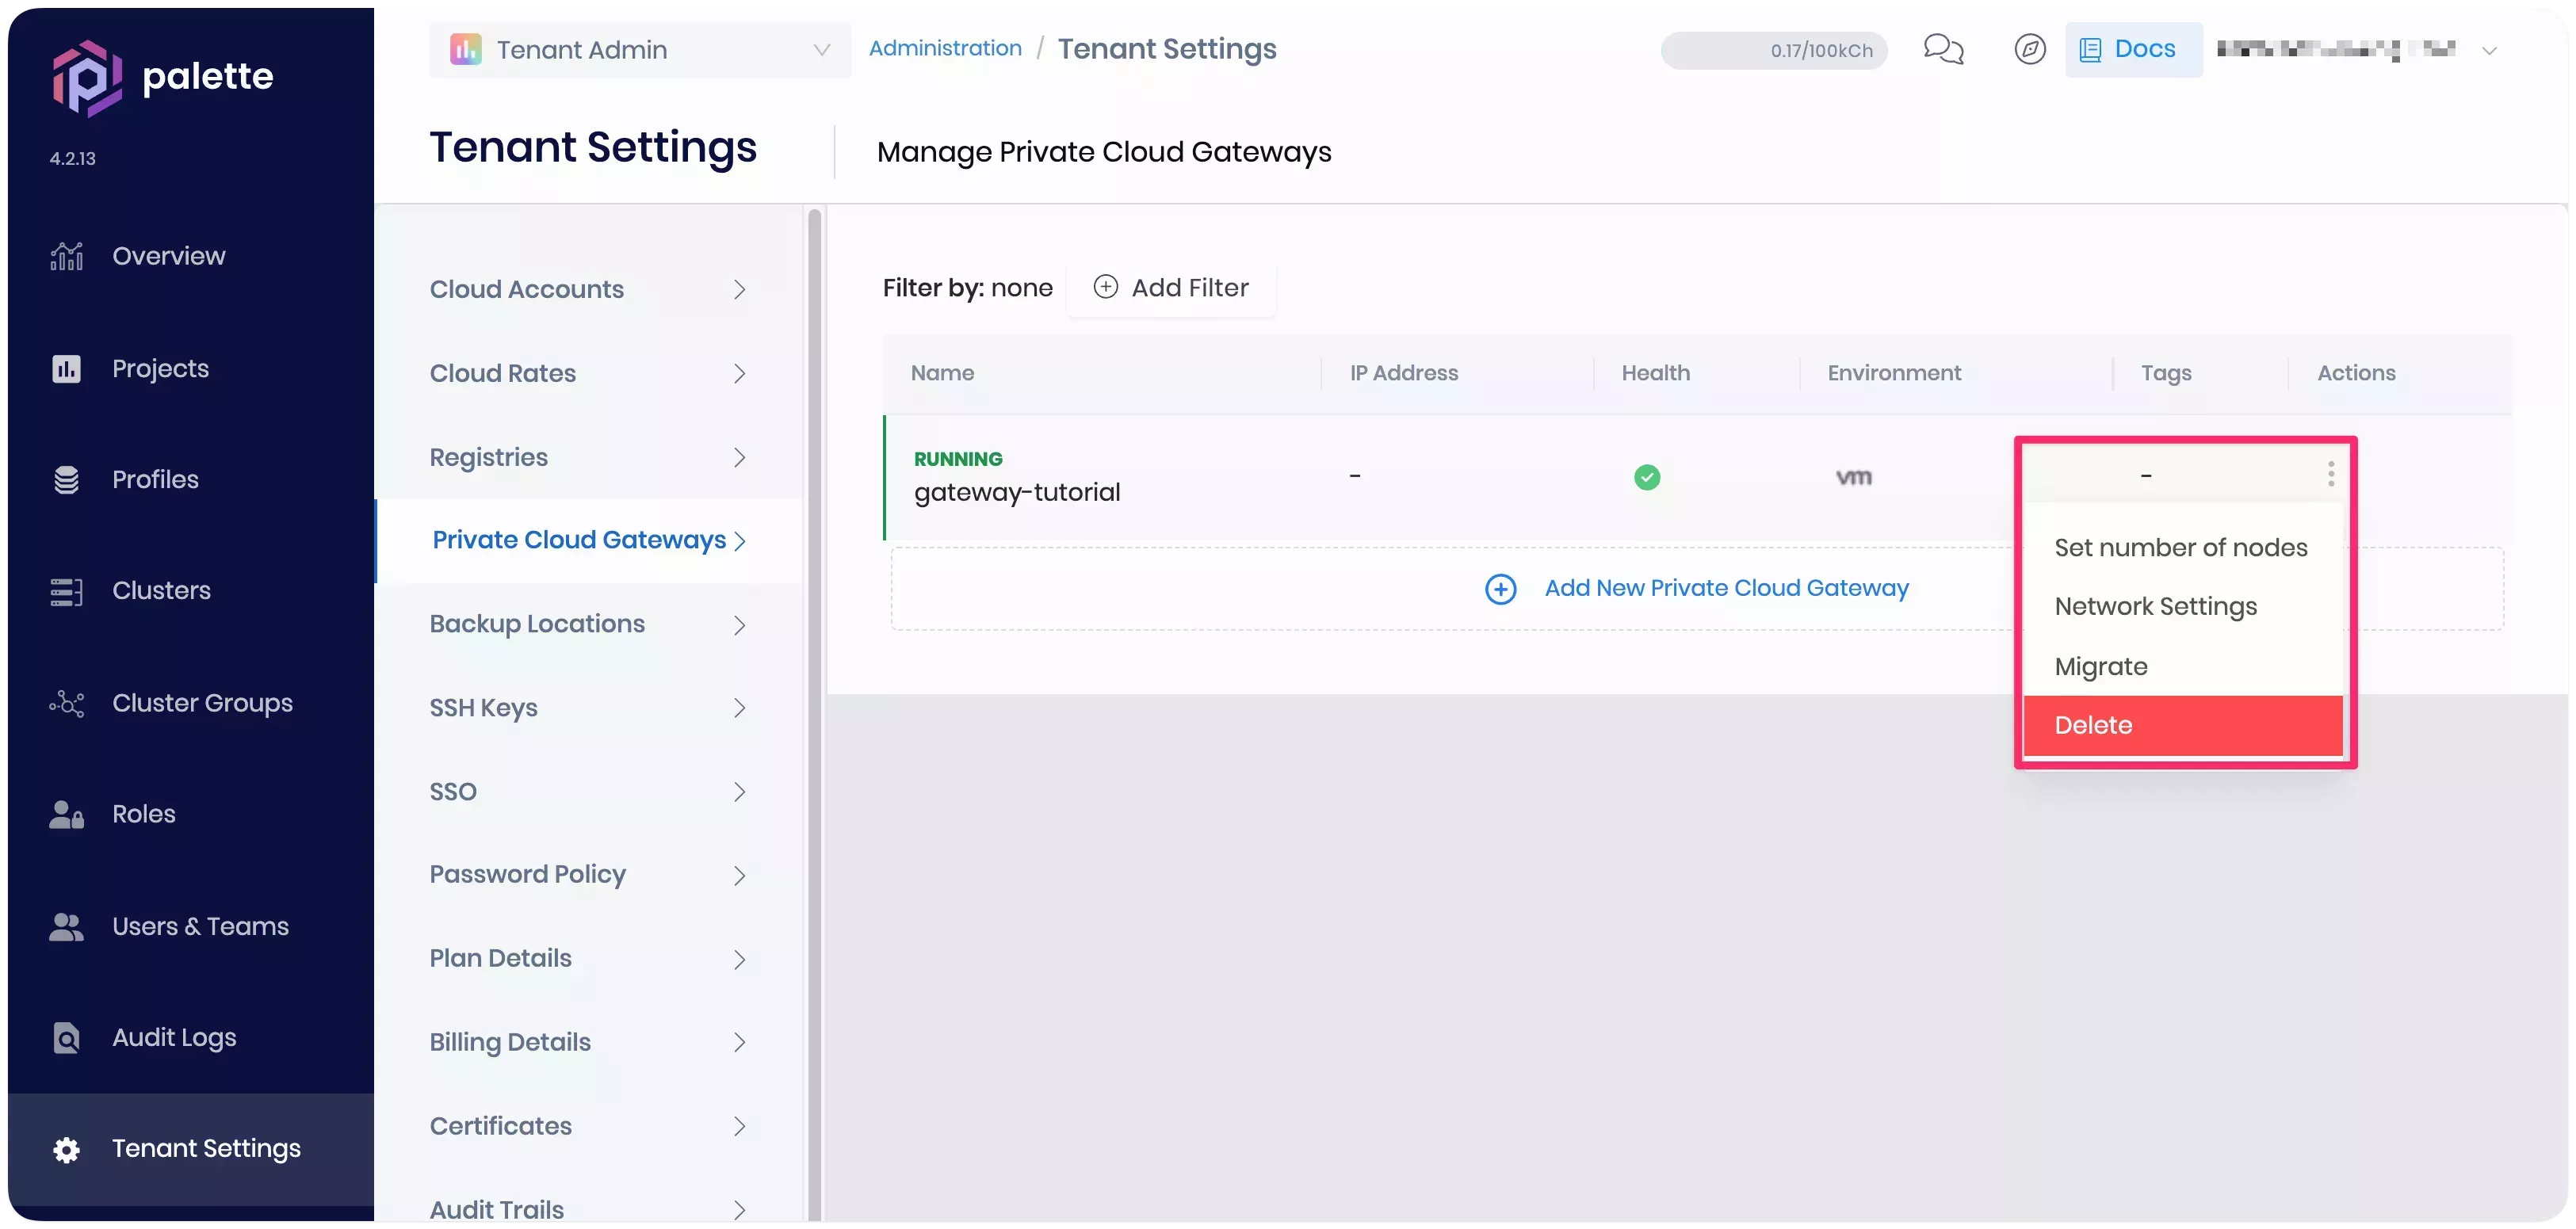
After deleting your VMware cluster and cluster profile, proceed with the PCG deletion. Log in to Palette as a tenant admin, navigate to the left Main Menu and select Tenant Settings. Next, from the Tenant Settings Menu, click on Private Cloud Gateways. Identify the PCG you want to delete, click on the Three-Dot Menu at the end of the PCG row, and select Delete. Click OK to confirm the PCG deletion.
Palette will delete the PCG and the Palette services deployed on the PCG node. However, the underlying infrastructure resources, such as the virtual machine, must be removed manually from VMware vSphere.
Log in to your VMware vSphere server and select the VM representing the PCG node named gateway-tutorial-cp. Click on
the Three-Dot Actions button, select Power, and Power Off to power off the machine. Once the machine is
powered off, click on the Three-Dot Actions button again and select Delete from Disk to remove the machine from
your VMware vSphere environment.

Wrap-Up
In this tutorial, you used the cluster profile you created in the previous Create a Cluster Profile tutorial to deploy a host cluster onto VMware vSphere. After the cluster deployed, you verified the Hello Universe application was successfully deployed.
We recommend that you continue to the Deploy Cluster Profile Updates tutorial to learn how to update your host cluster.
🧑🚀 Catch up with Spacetastic
Wren and Kai have deployed their first cluster profile by following the steps described in this tutorial. They were impressed by how streamlined the process was and how the cluster profiles provided them with a deployment blueprint.
"Deploying our first cluster with Palette was intuitive." says Wren. "It's ideal to find an external partner that can take care of our Kubernetes infrastructure and free us up to deliver more educational features. I definitely think that Palette has the capabilities to take care of all the Kubernetes heavy lifting for us."
"I agree with you and I'm glad to hear you're not as skeptical anymore." says Kai, nodding and laughing. "From a platform engineering perspective, I can say that cluster profiles will provide us with reliable deployments across environments and even clouds, so I'm much more confident about our testing and deployment strategy."
Meera, Head of Cybersecurity, walks in holding a file. "I've done our security due diligence and I'm happy to report that Spectro Cloud adheres to the highest security standards. I'm happy to approve Palette for use in our organization."
"It seems like we've found a great platform that can support us. Let's explore the rest of the Getting Started section to understand what else Palette has to offer." says Kai turning back to their monitor.