Deploy an Edge Cluster on VirtualBox
Palette Edge allows users to deploy Kubernetes workloads in remote locations with limited connectivity and compute infrastructure. This means you can use Palette to manage the lifecycle of your Kubernetes clusters at the edge in places such as hospitals, rural areas, restaurants, and more.
Edge clusters are Kubernetes clusters set up on Edge hosts, which can be bare metal or virtual machines. These hosts can be managed locally on-site through the Local UI or centrally through the Palette management plane.
Before forming a cluster, the Edge hosts must be prepared and registered with Palette. This involves the EdgeForge workflow, which is responsible for building the required Edge artifacts, such as the Installer ISO and Provider Images. Once these artifacts are built, you can use the Installer ISO to bootstrap the Edge installation on your Edge host and the Provider Images to create a cluster profile.
This tutorial will help you understand how the different Edge components work together. You will build and test the Edge artifacts and deploy an Edge cluster without the need for a complex lab environment or separate physical devices. Specifically, you will learn to deploy an Edge cluster along with a demo application using a VirtualBox VM as the Edge host.
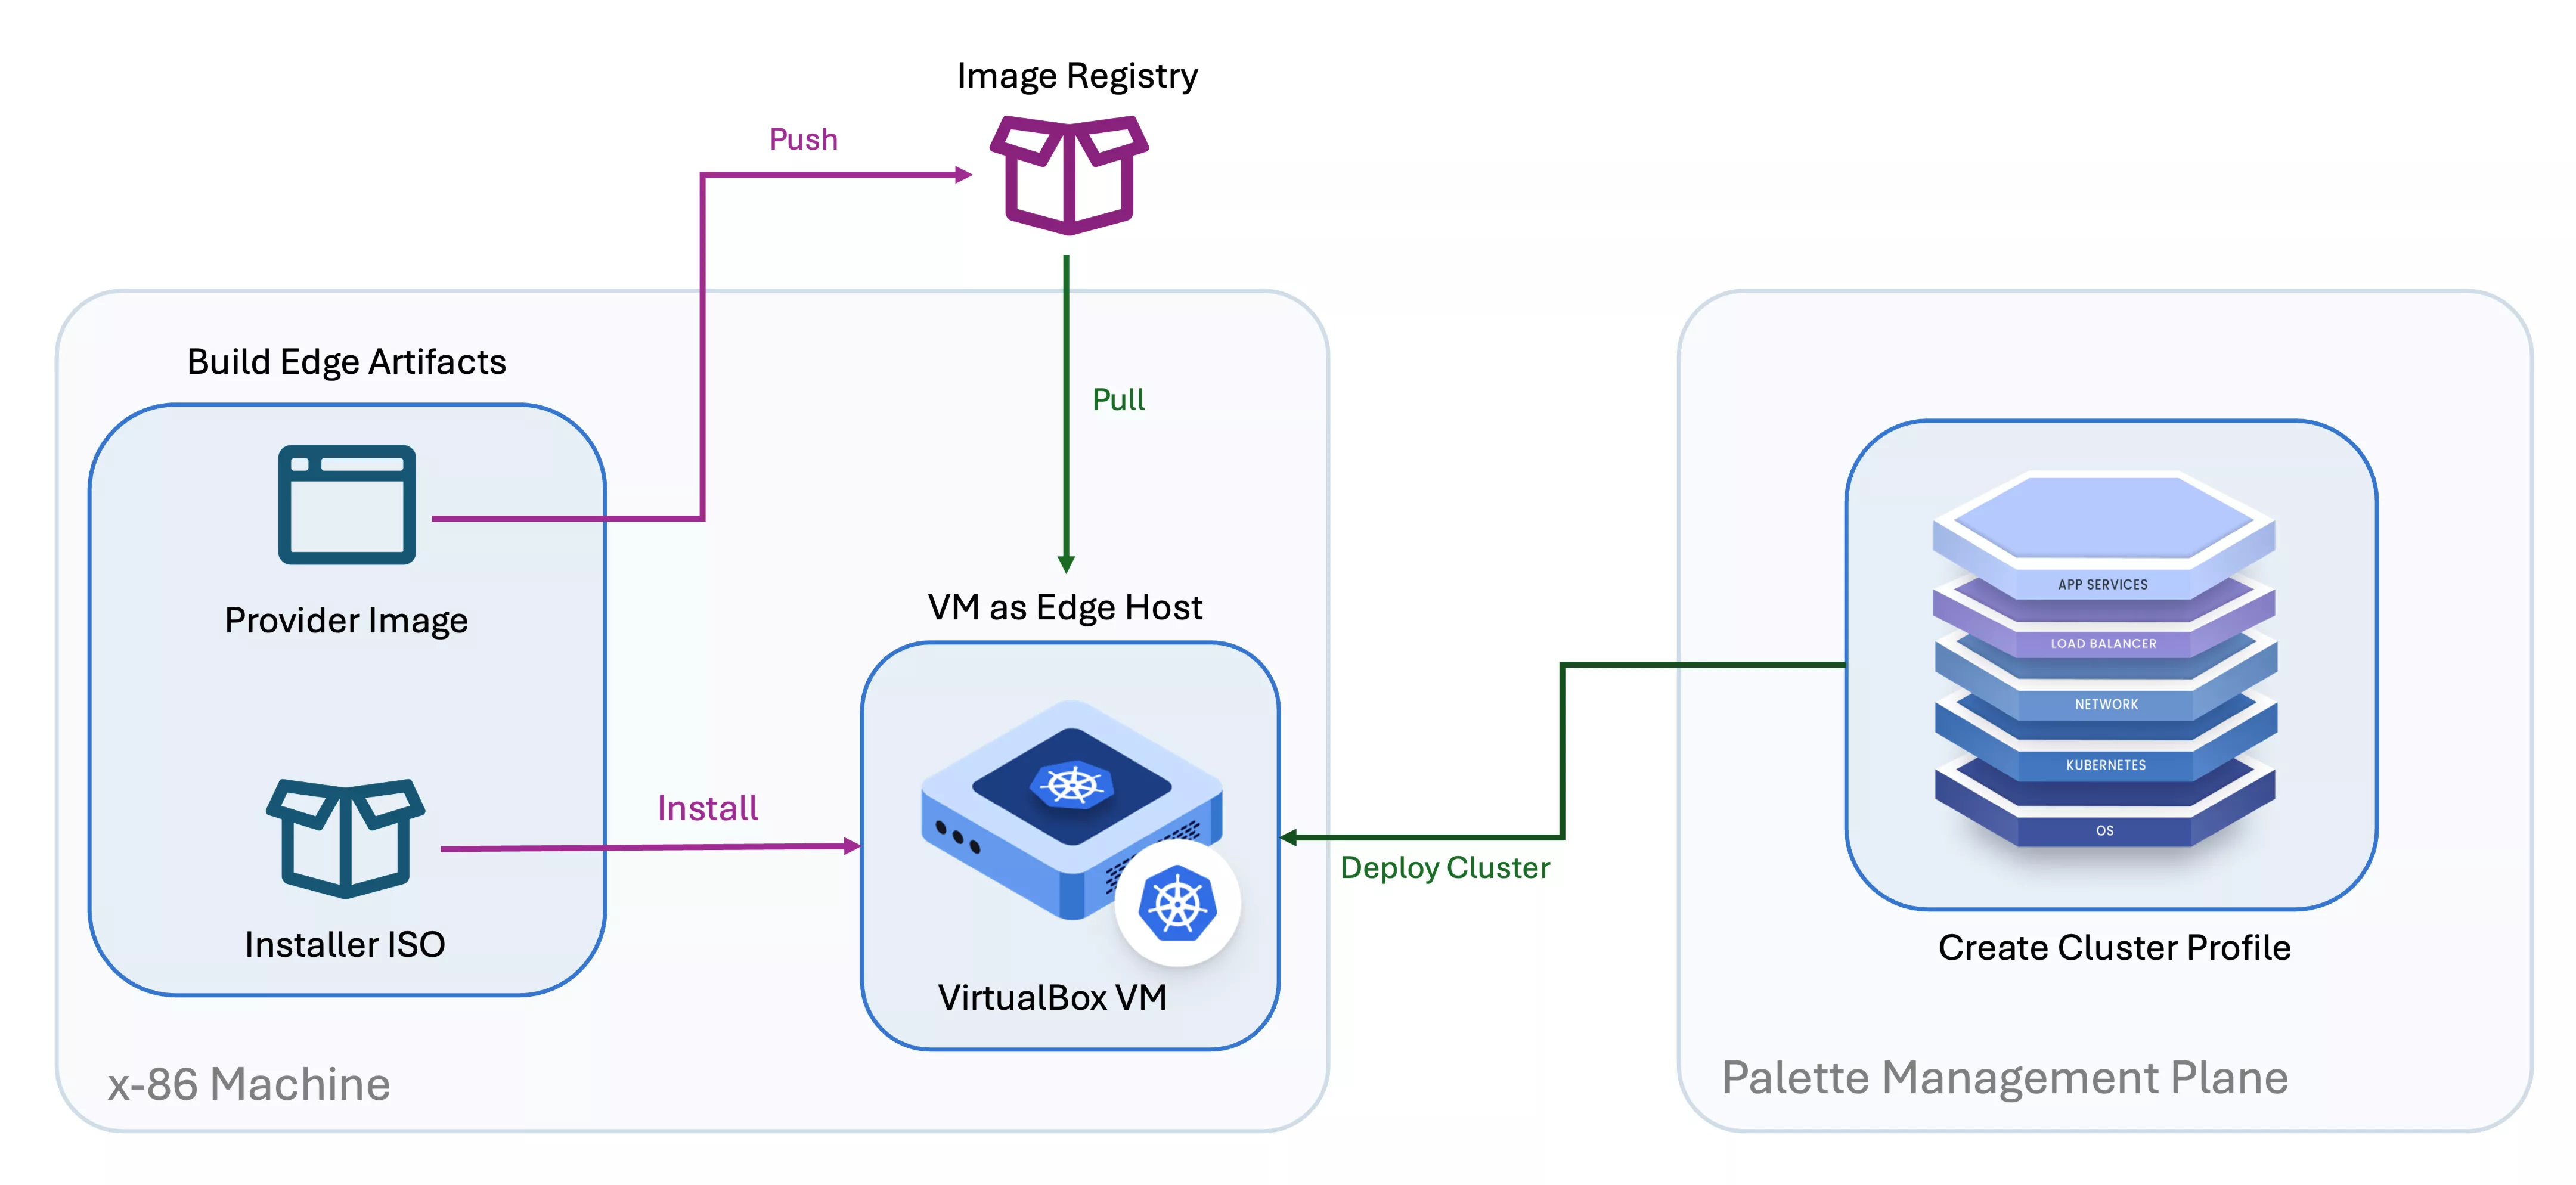
The diagram below illustrates how the components that will be deployed in this tutorial interact with each other.
Prerequisites
To complete this tutorial, you will need the following prerequisites in place.
- A host with AMD64 (also known as x86_64) processor architecture and access to the Internet. The host must meet the
minimum requirements to
build the artifacts and allow the creation of a VM with the following specifications:
- 2 CPU
- 8 GB memory
- 100 GB storage
- A DHCP-enabled network.
- Three available IP addresses on the same network as the host machine. One address is for the Edge host, one is for the cluster's Virtual IP (VIP) address, and one is for the MetalLB load balancer.
- A Palette account with tenant admin access.
- A Palette tenant registration token. Refer to the Create a Registration Token guide for instructions on how to create a token.
- The following software installed:
- A text editor such as Vi or Nano. This tutorial uses Vi as an example.
- Docker Engine with
sudoprivileges - Git
- VirtualBox version 7.0
EdgeForge Workflow
The first step to deploying an Edge cluster is to prepare your Edge host with all the required components. This process is called EdgeForge and uses the CanvOS utility. In this section, you will build the Installer ISO and provider images Edge artifacts.
- Installer ISO: ISO file that contains the Palette Edge host agent and metadata. It bootstraps the Edge installation in your Edge host.
- Provider Images: Kairos-based images containing the OS and the desired Kubernetes versions. The provider images are used in the OS layer when creating an Edge cluster profile.
If you want your Edge host to have preloaded content and be able to create clusters using this content, you can create a content bundle and build it into your Installer ISO.
Setup Your Local Environment
Open up a terminal window in your host machine and clone the CanvOS repository. This repository contains the code and scripts required to build Edge artifacts.
git clone https://github.com/spectrocloud/CanvOS.git
Next, navigate to the CanvOS directory.
cd CanvOS
Check the available git tags.
git tag
Check out the newest available tag. This tutorial uses the tag v4.4.12 as an example.
git checkout v4.4.12
Define Arguments
EdgeForge leverages Earthly to build the Installer ISO and provider images artifacts. The .arg file is used to pass the values of a few arguments, such as the image tag and registry name, to Earthly for the build process.
Execute the command below to create a custom tag for the provider images. The tag must be an alphanumeric lowercase
string. This tutorial uses vbox-tutorial as an example.
export CUSTOM_TAG=vbox-tutorial
Next, issue the following command to create the .arg file with the custom tag. The other arguments will use the predefined values. For example, K3s will be defined as the Kubernetes distribution, Ubuntu as the OS distribution, and ttl.sh as the image registry.
cat << EOF > .arg
CUSTOM_TAG=$CUSTOM_TAG
IMAGE_REGISTRY=ttl.sh
OS_DISTRIBUTION=ubuntu
IMAGE_REPO=ubuntu
OS_VERSION=22
K8S_DISTRIBUTION=k3s
ISO_NAME=palette-installer
ARCH=amd64
UPDATE_KERNEL=false
EOF
Verify that the file was created correctly using the cat command.
cat .arg
Different versions of CanvOS may require different arguments. Refer to the CanvOS repository to learn more about the required arguments for each version tag.
Create User Data
Once the .arg file is ready, the next step is to create a user-data file, which allows you to provide customized configuration to the Edge Installer ISO. In this tutorial, the file will be used to embed the Palette registration token, Palette endpoint, and Edge host login information into the Edge Installer ISO. The login credentials allow you to SSH into your Edge host.
Export your Palette registration token.
export TOKEN=<your-palette-registration-token>
Then, issue the command below to create the user-data file using the token.
cat << EOF > user-data
#cloud-config
stylus:
  site:
    edgeHostToken: $TOKEN
    paletteEndpoint: api.spectrocloud.com

users:
  - name: kairos
    passwd: kairos
EOF
Confirm that the file was created correctly.
cat user-data
The output should contain the value of your Palette registration token assigned to the edgeHostToken parameter, as
displayed in the example output below.
#cloud-config
stylus:
  site:
    paletteEndpoint: api.spectrocloud.com
    edgeHostToken: ****************

users:
  - name: kairos
    passwd: kairos
Build Edge Artifacts
By default, Earthly builds multiple images with different K3s Kubernetes versions. You can exclude the image versions
you do not need from the build process by deleting the lines under the k3s section in the k8s_version.json file.
This will speed up the build process and reduce the amount of space that is required from your host machine.
Open the k8s_version.json file with an editor of your choice.
vi k8s_version.json
Next, delete the K3s versions you do not need. This tutorial uses K3s version 1.29.6. Below is an example of the file
with all other versions deleted.
{
  "k3s": [
    "1.29.6"
  ],

  ...

}
Once you are done making the alterations, save and exit the file.
If you are using a CanvOS tag that is earlier than v4.4.12, the k8s_version.json file does not exist in those tags.
Instead, open the Earthfile in the CanvOS directory. Under build-provider-images, remove the lines containing
Kubernetes versions that you do not need.
Next, execute the command below to build the Edge Installer ISO and provider images artifacts.
sudo ./earthly.sh +build-all-images
The build may take 15 to 20 minutes to complete, depending on the hardware resources available on the host machine. Once finished, you get a success message similar to the one displayed below.
# Lines omitted for readability
========================== 🌍 Earthly Build  ✅ SUCCESS ==========================
The output also includes a manifest with predefined parameters that are required to create the cluster profile. Copy and save the manifest, as you will need it later.
pack:
  content:
    images:
      - image: "{{.spectro.pack.edge-native-byoi.options.system.uri}}"
  # Below config is default value, please uncomment if you want to modify default values
  #drain:
    #cordon: true
    #timeout: 60 # The length of time to wait before giving up, zero means infinite
    #gracePeriod: 60 # Period of time in seconds given to each pod to terminate gracefully. If negative, the default value specified in the pod will be used
    #ignoreDaemonSets: true
    #deleteLocalData: true # Continue even if there are pods using emptyDir (local data that will be deleted when the node is drained)
    #force: true # Continue even if there are pods that do not declare a controller
    #disableEviction: false # Force drain to use delete, even if eviction is supported. This will bypass checking PodDisruptionBudgets, use with caution
    #skipWaitForDeleteTimeout: 60 # If pod DeletionTimestamp older than N seconds, skip waiting for the pod. Seconds must be greater than 0 to skip.
options:
  system.uri: "{{ .spectro.pack.edge-native-byoi.options.system.registry }}/{{ .spectro.pack.edge-native-byoi.options.system.repo }}:{{ .spectro.pack.edge-native-byoi.options.system.k8sDistribution }}-{{ .spectro.system.kubernetes.version }}-{{ .spectro.pack.edge-native-byoi.options.system.peVersion }}-{{ .spectro.pack.edge-native-byoi.options.system.customTag }}"


  system.registry: ttl.sh
  system.repo: ubuntu
  system.k8sDistribution: k3s
  system.osName: ubuntu
  system.peVersion: v4.4.12
  system.customTag: vbox-tutorial
  system.osVersion: 22
Once the build is complete, confirm that the Edge Installer ISO and its checksum were created correctly.
ls build
palette-installer.iso
palette-installer.iso.sha256
List the container images to confirm that the provider images were built successfully.
docker images --filter=reference="*/*:*$CUSTOM_TAG"
REPOSITORY      TAG                               IMAGE ID       CREATED          SIZE
ttl.sh/ubuntu   k3s-1.29.6-v4.4.12-vbox-tutorial   75811e3dfb42   13 minutes ago   3.63GB
Push Provider Images
Push the provider images to the ttl.sh registry so that you can reference it when creating the cluster profile.
docker push ttl.sh/ubuntu:k3s-1.29.6-v4.4.12-$CUSTOM_TAG
The output confirms that the image was pushed to the registry with the correct tag.
# Lines omitted for readability
k3s-1.29.6-v4.4.12-vbox-tutorial: digest: sha256:42f8805830c7fd3816bb27e8d710d1747fea31a70cb7718d74e42fe1c0ed53ac size: 17815
ttl.sh is free and does not require you to sign in to use it. However, this is a short-lived image registry, which means that the pushed images will expire after 24 hours. Refer to the Build Edge Artifacts guide to learn how to push images to a different registry.
Create Cluster Profile
Once the provider images are available in the registry, create the cluster profile.
Log in to Palette. Then, select Profiles from the left Main Menu. Click Add Cluster Profile to create a cluster profile.
Follow the wizard to create a new profile.
In the Basic Information section, assign the name edge-vbox-profile and a brief profile description, select the type as Full, and assign the tag env:edge. You can leave the version empty if you want to. Just be aware that the version defaults to 1.0.0. Click on Next.
The Cloud Type section allows you to choose the infrastructure provider for the cluster. Select Edge Native and click Next.
The Profile Layers section specifies the packs that compose the profile.
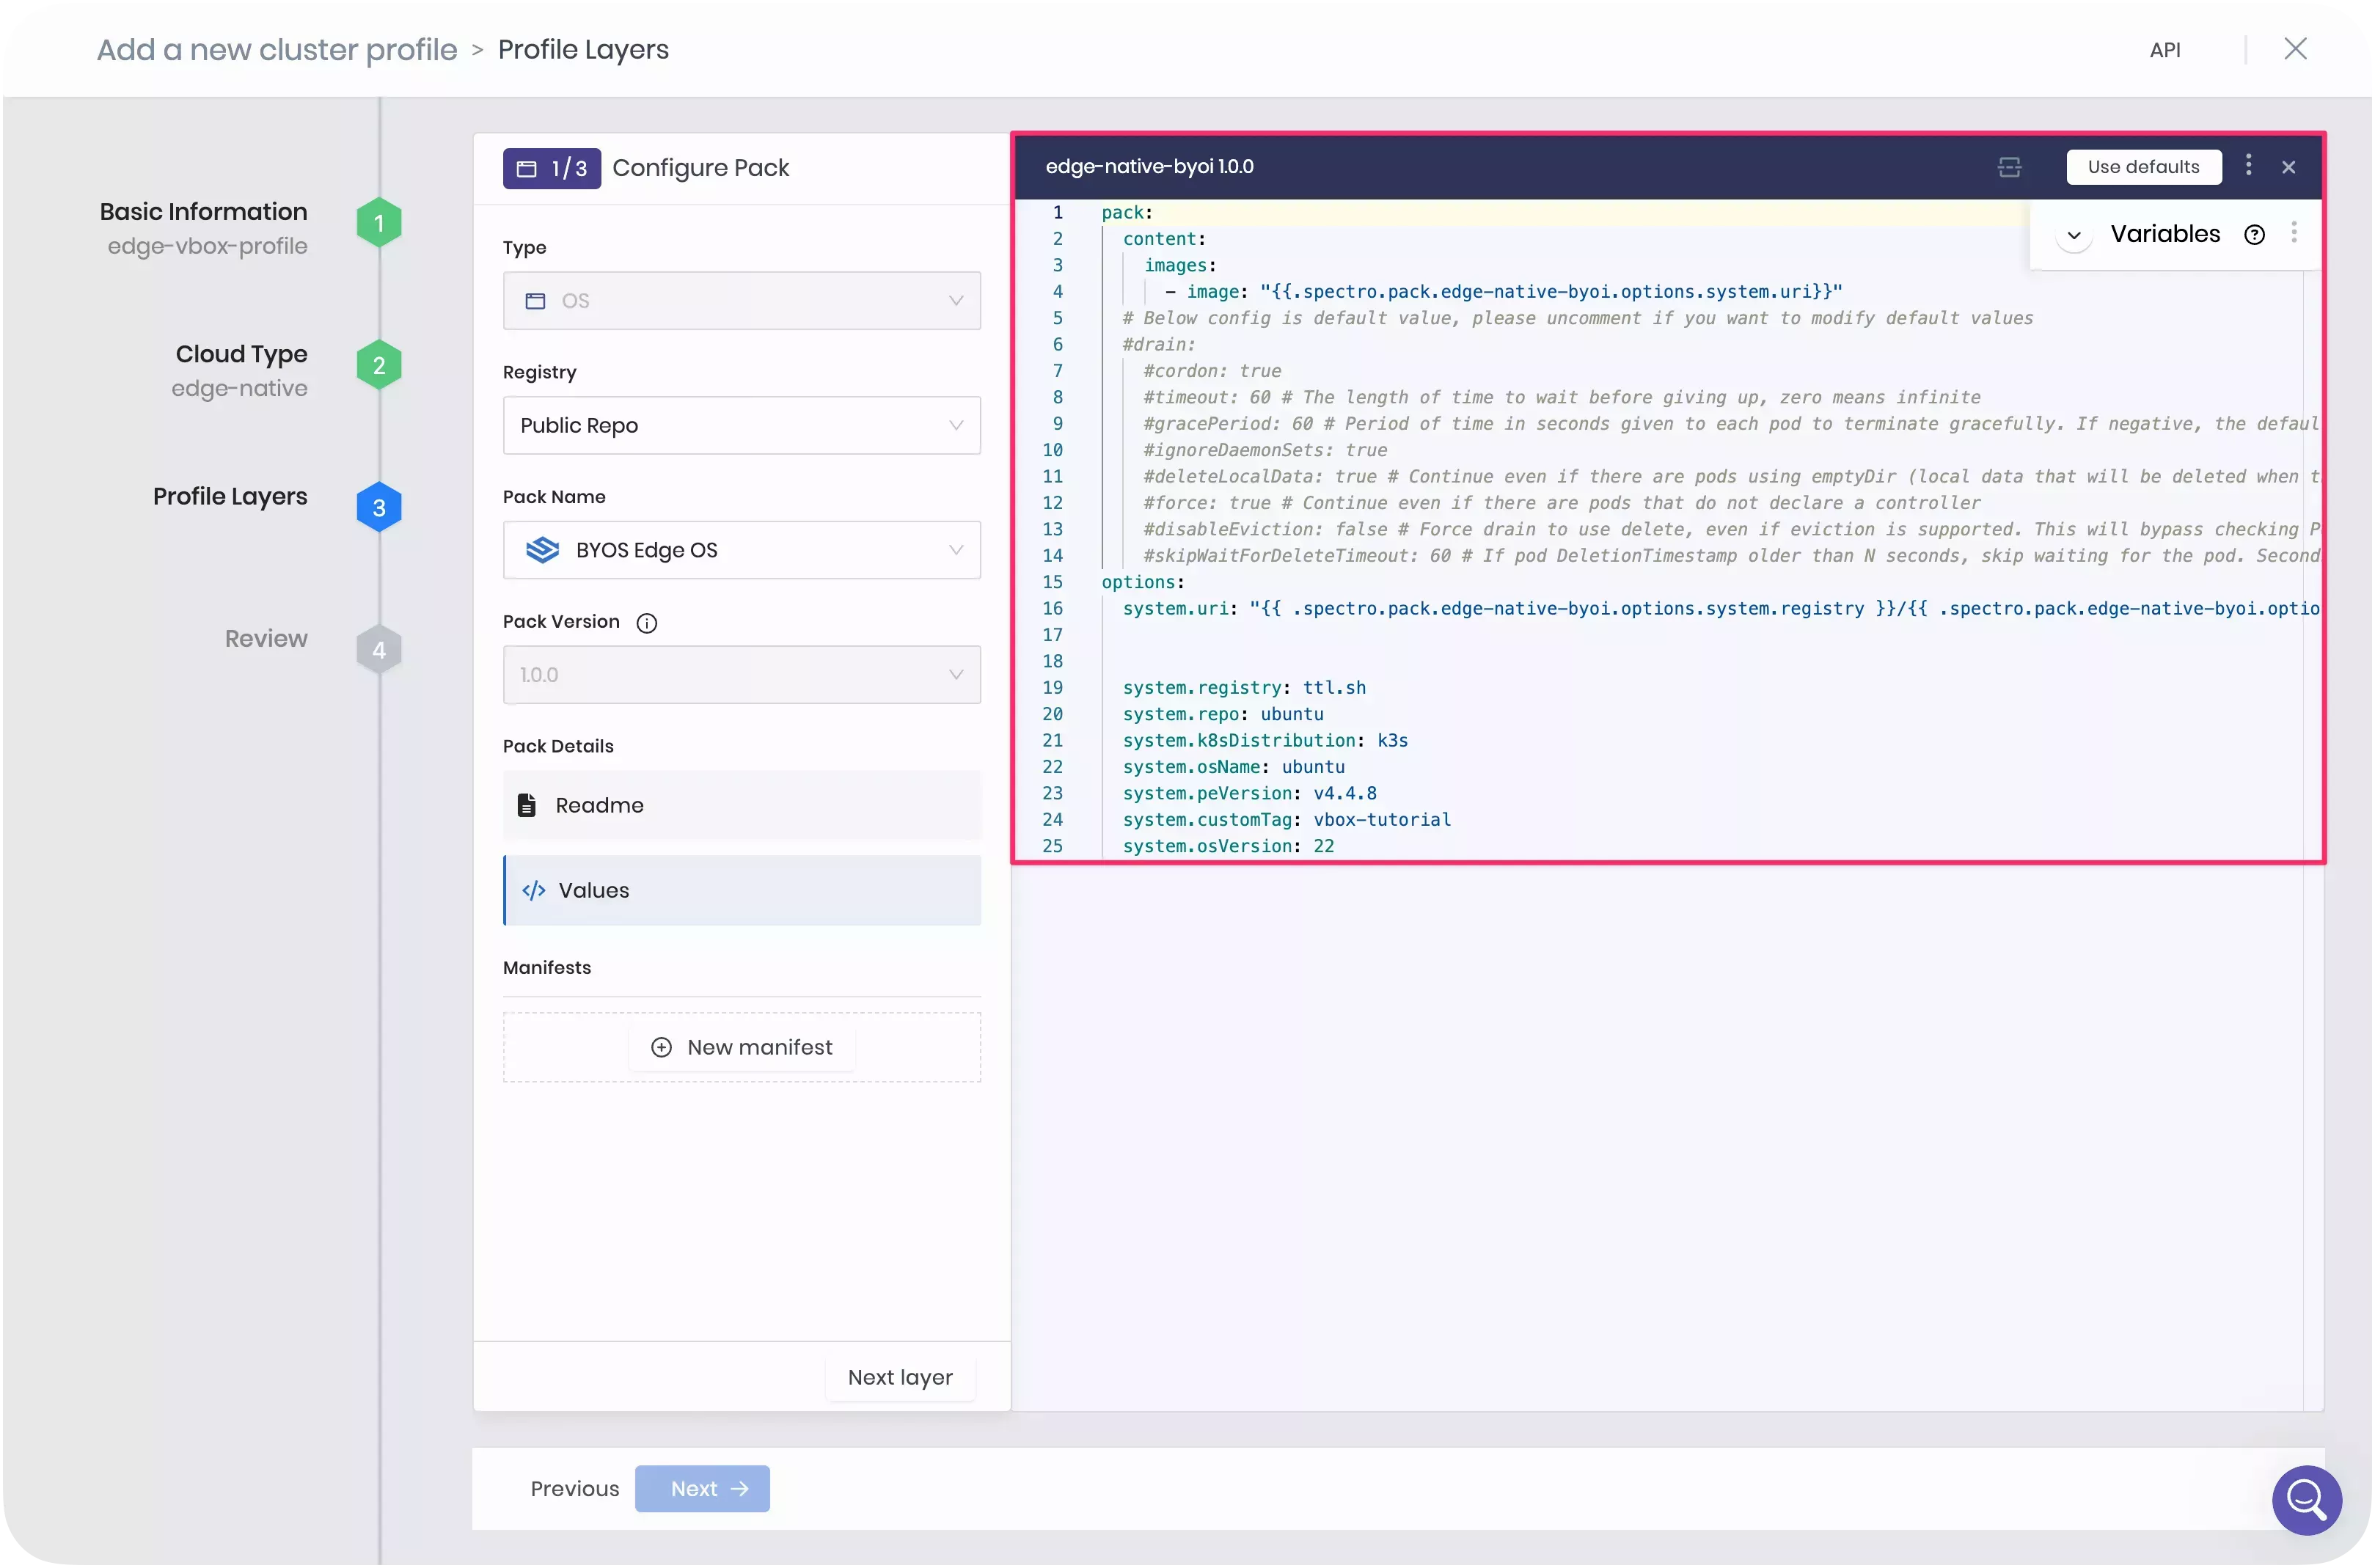
Add the BYOS Edge OS pack to the OS layer.
| Pack Name | Version | Registry | Layer |
|---|---|---|---|
| BYOS Edge OS | 1.0.0 | Public Repo | Operating System |
Replace the layer manifest with the custom manifest you built in the Build Edge Artifacts section. This will make the cluster profile pull the provider images from the ttl.sh registry. The image below displays the OS layer with the custom manifest.
Click Next Layer to proceed to the next layer. Add the following Kubernetes layer to your cluster profile. The Kubernetes version must match the version used in the provider images.
| Pack Name | Version | Registry | Layer |
|---|---|---|---|
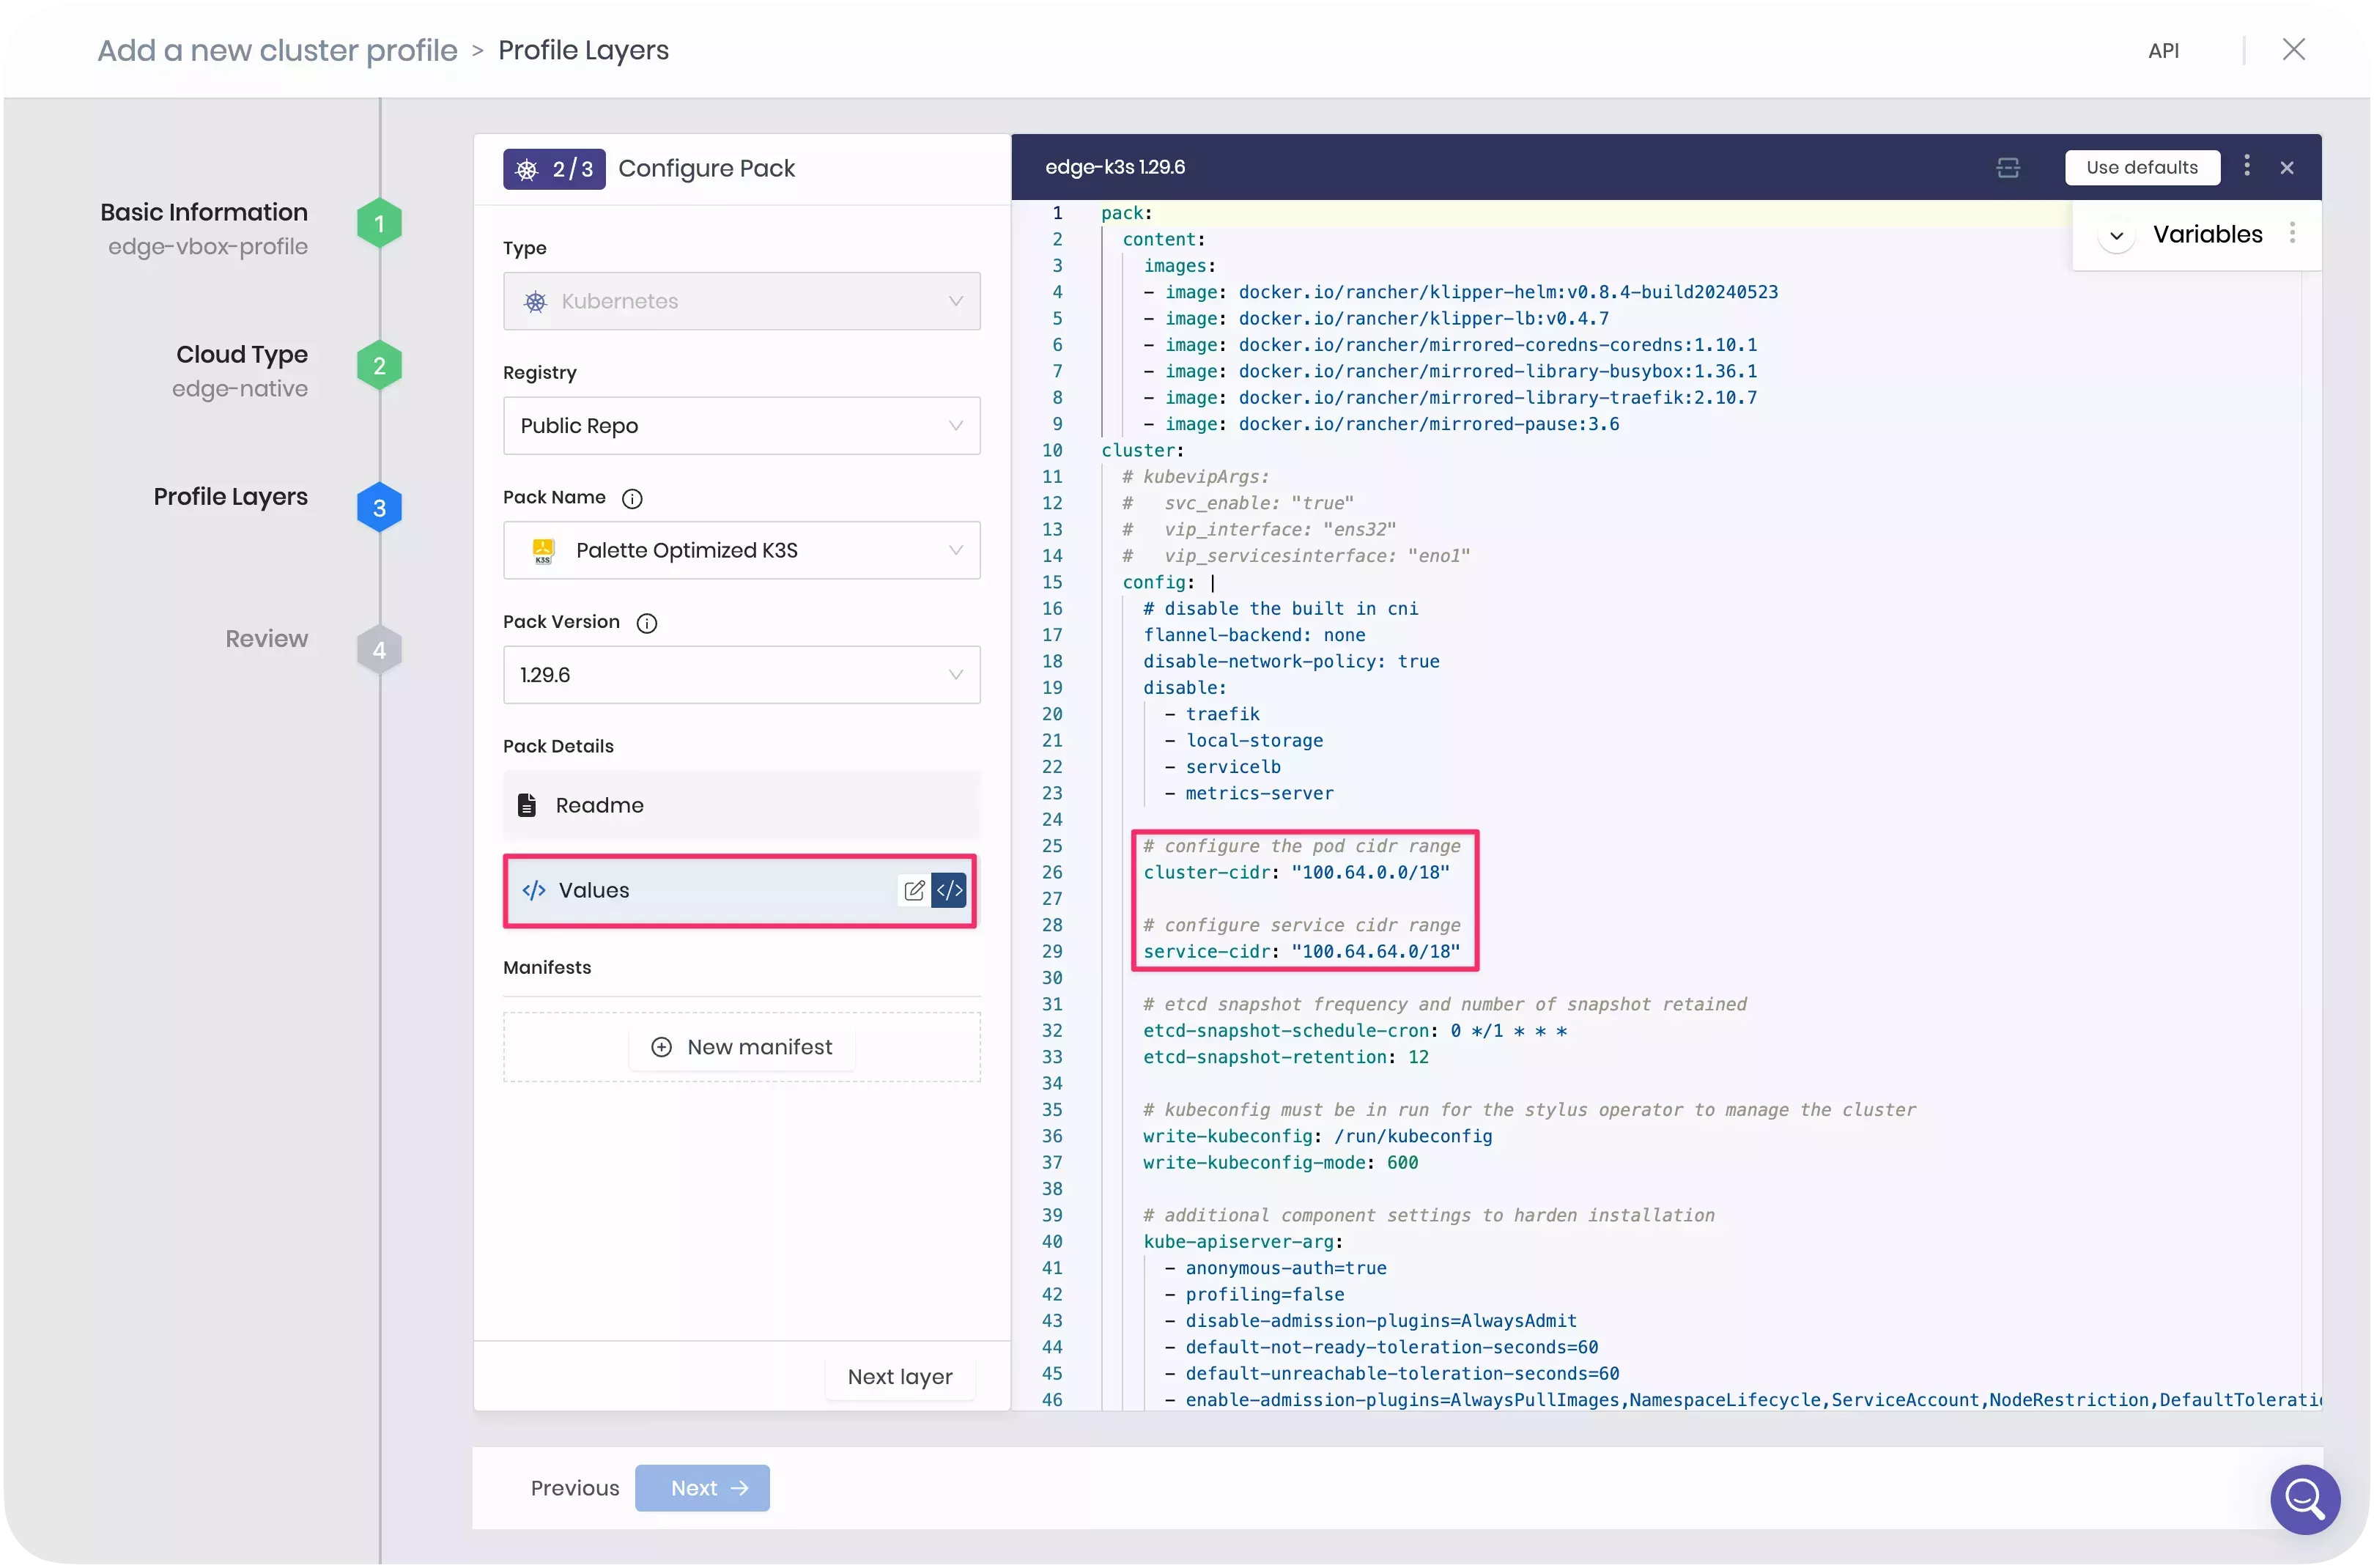
| Palette Optimized K3S | 1.29.6 | Public Repo | Kubernetes |
Click Values under Pack Details, and replace the predefined cluster-cidr and service-cidr IP CIDRs if
they overlap with your network. For example, you can set the cluster-cidr parameter to "100.64.0.0/18" and
service-cidr to "100.64.64.0/18". This prevents any routing conflicts in the internal pod networking.
Click Next Layer to add the network layer. This tutorial uses Cilium as an example.
| Pack Name | Version | Registry | Layer |
|---|---|---|---|
| Cilium | 1.15.3 | Public Repo | Network |
Click Confirm after you have completed filling out all the core layers.
Next, to add the add-on layers, click Add New Pack and search for MetalLB. Add the following pack to your cluster profile.
| Pack Name | Version | Registry | Layer |
|---|---|---|---|
| MetalLB (Helm) | 0.14.8 | Public Repo | Load Balancer |
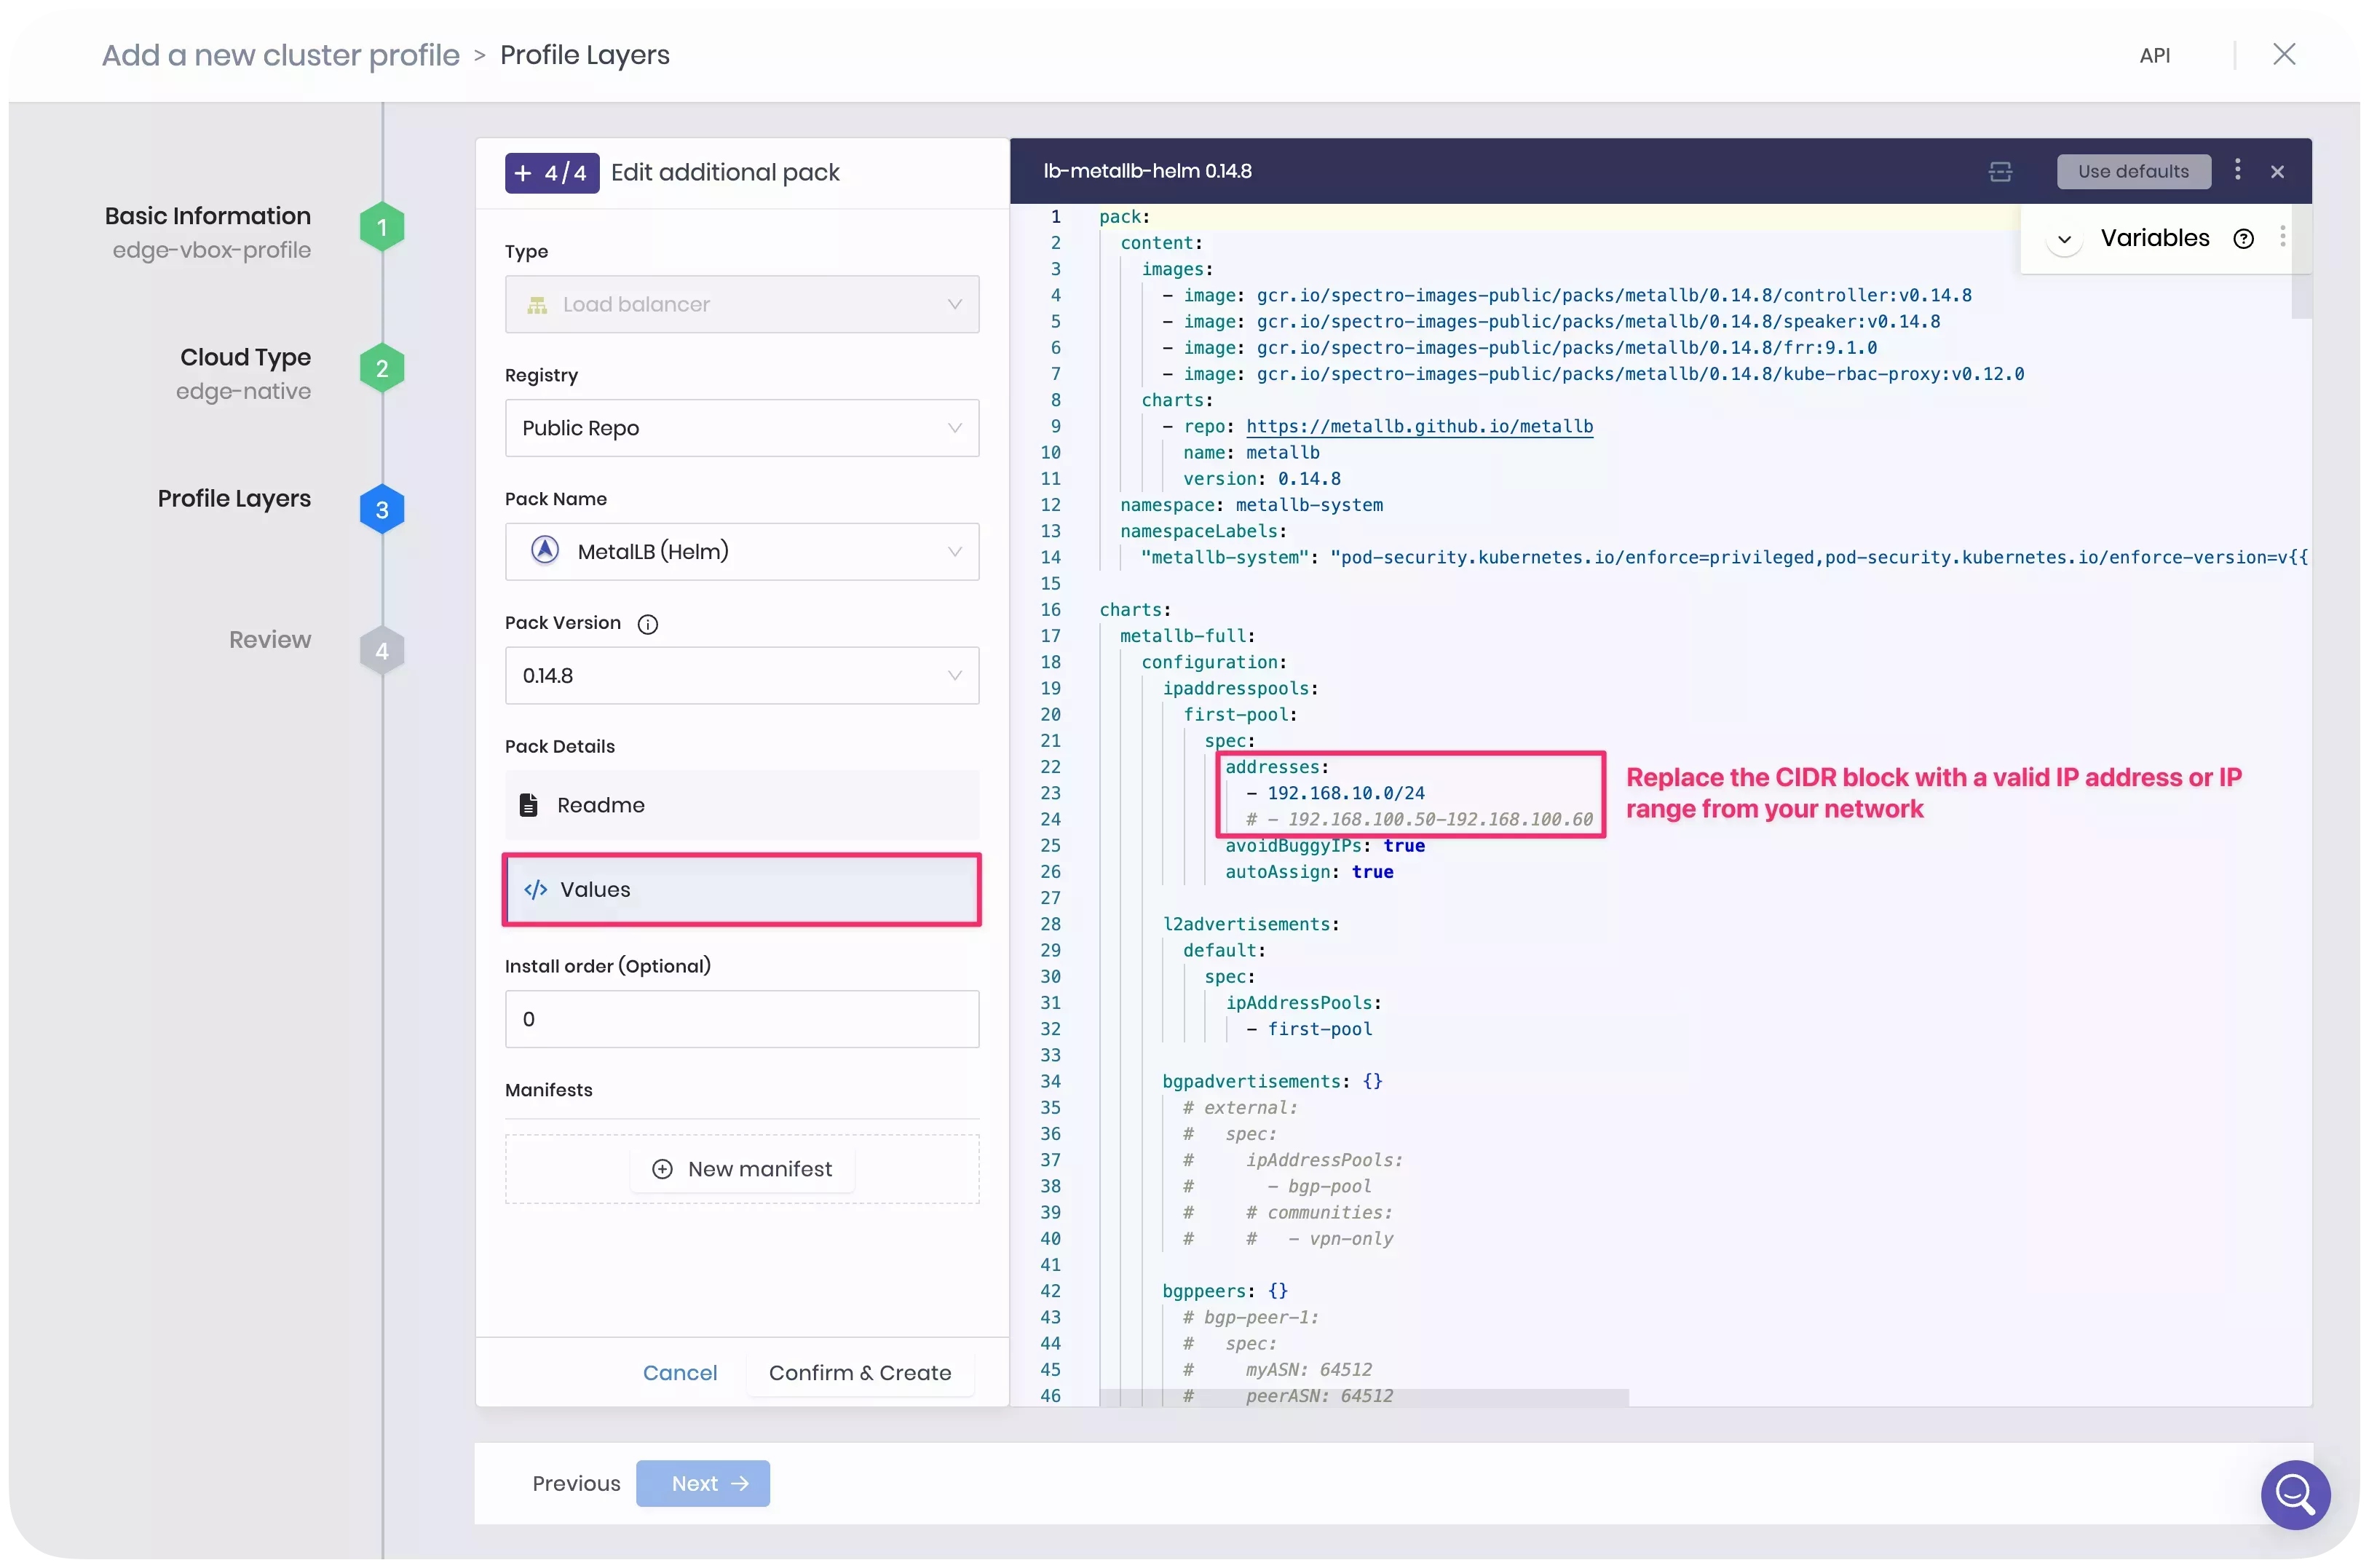
The MetalLB pack provides a load-balancer implementation for your Edge Kubernetes cluster. The load balancer is required to help the LoadBalancer service specified in the Hello Universe pack obtain an IP address, so that you can access the demo application from your browser.
Click Values under Pack Details and replace the predefined 192.168.10.0/24 IP CIDR listed below the
addresses line with a valid IP address or IP range from your network. Next, click Confirm & Create to add the
MetalLB pack.
Finally, click Add New Pack again and search for the Hello Universe pack.
| Pack Name | Version | Registry | Layer |
|---|---|---|---|
| Hello Universe | 1.1.2 | Palette Community Registry | Application |
Once you select the pack, Palette will display its README file, providing additional guidance on usage and configuration options. This pack deploys the hello-universe application.
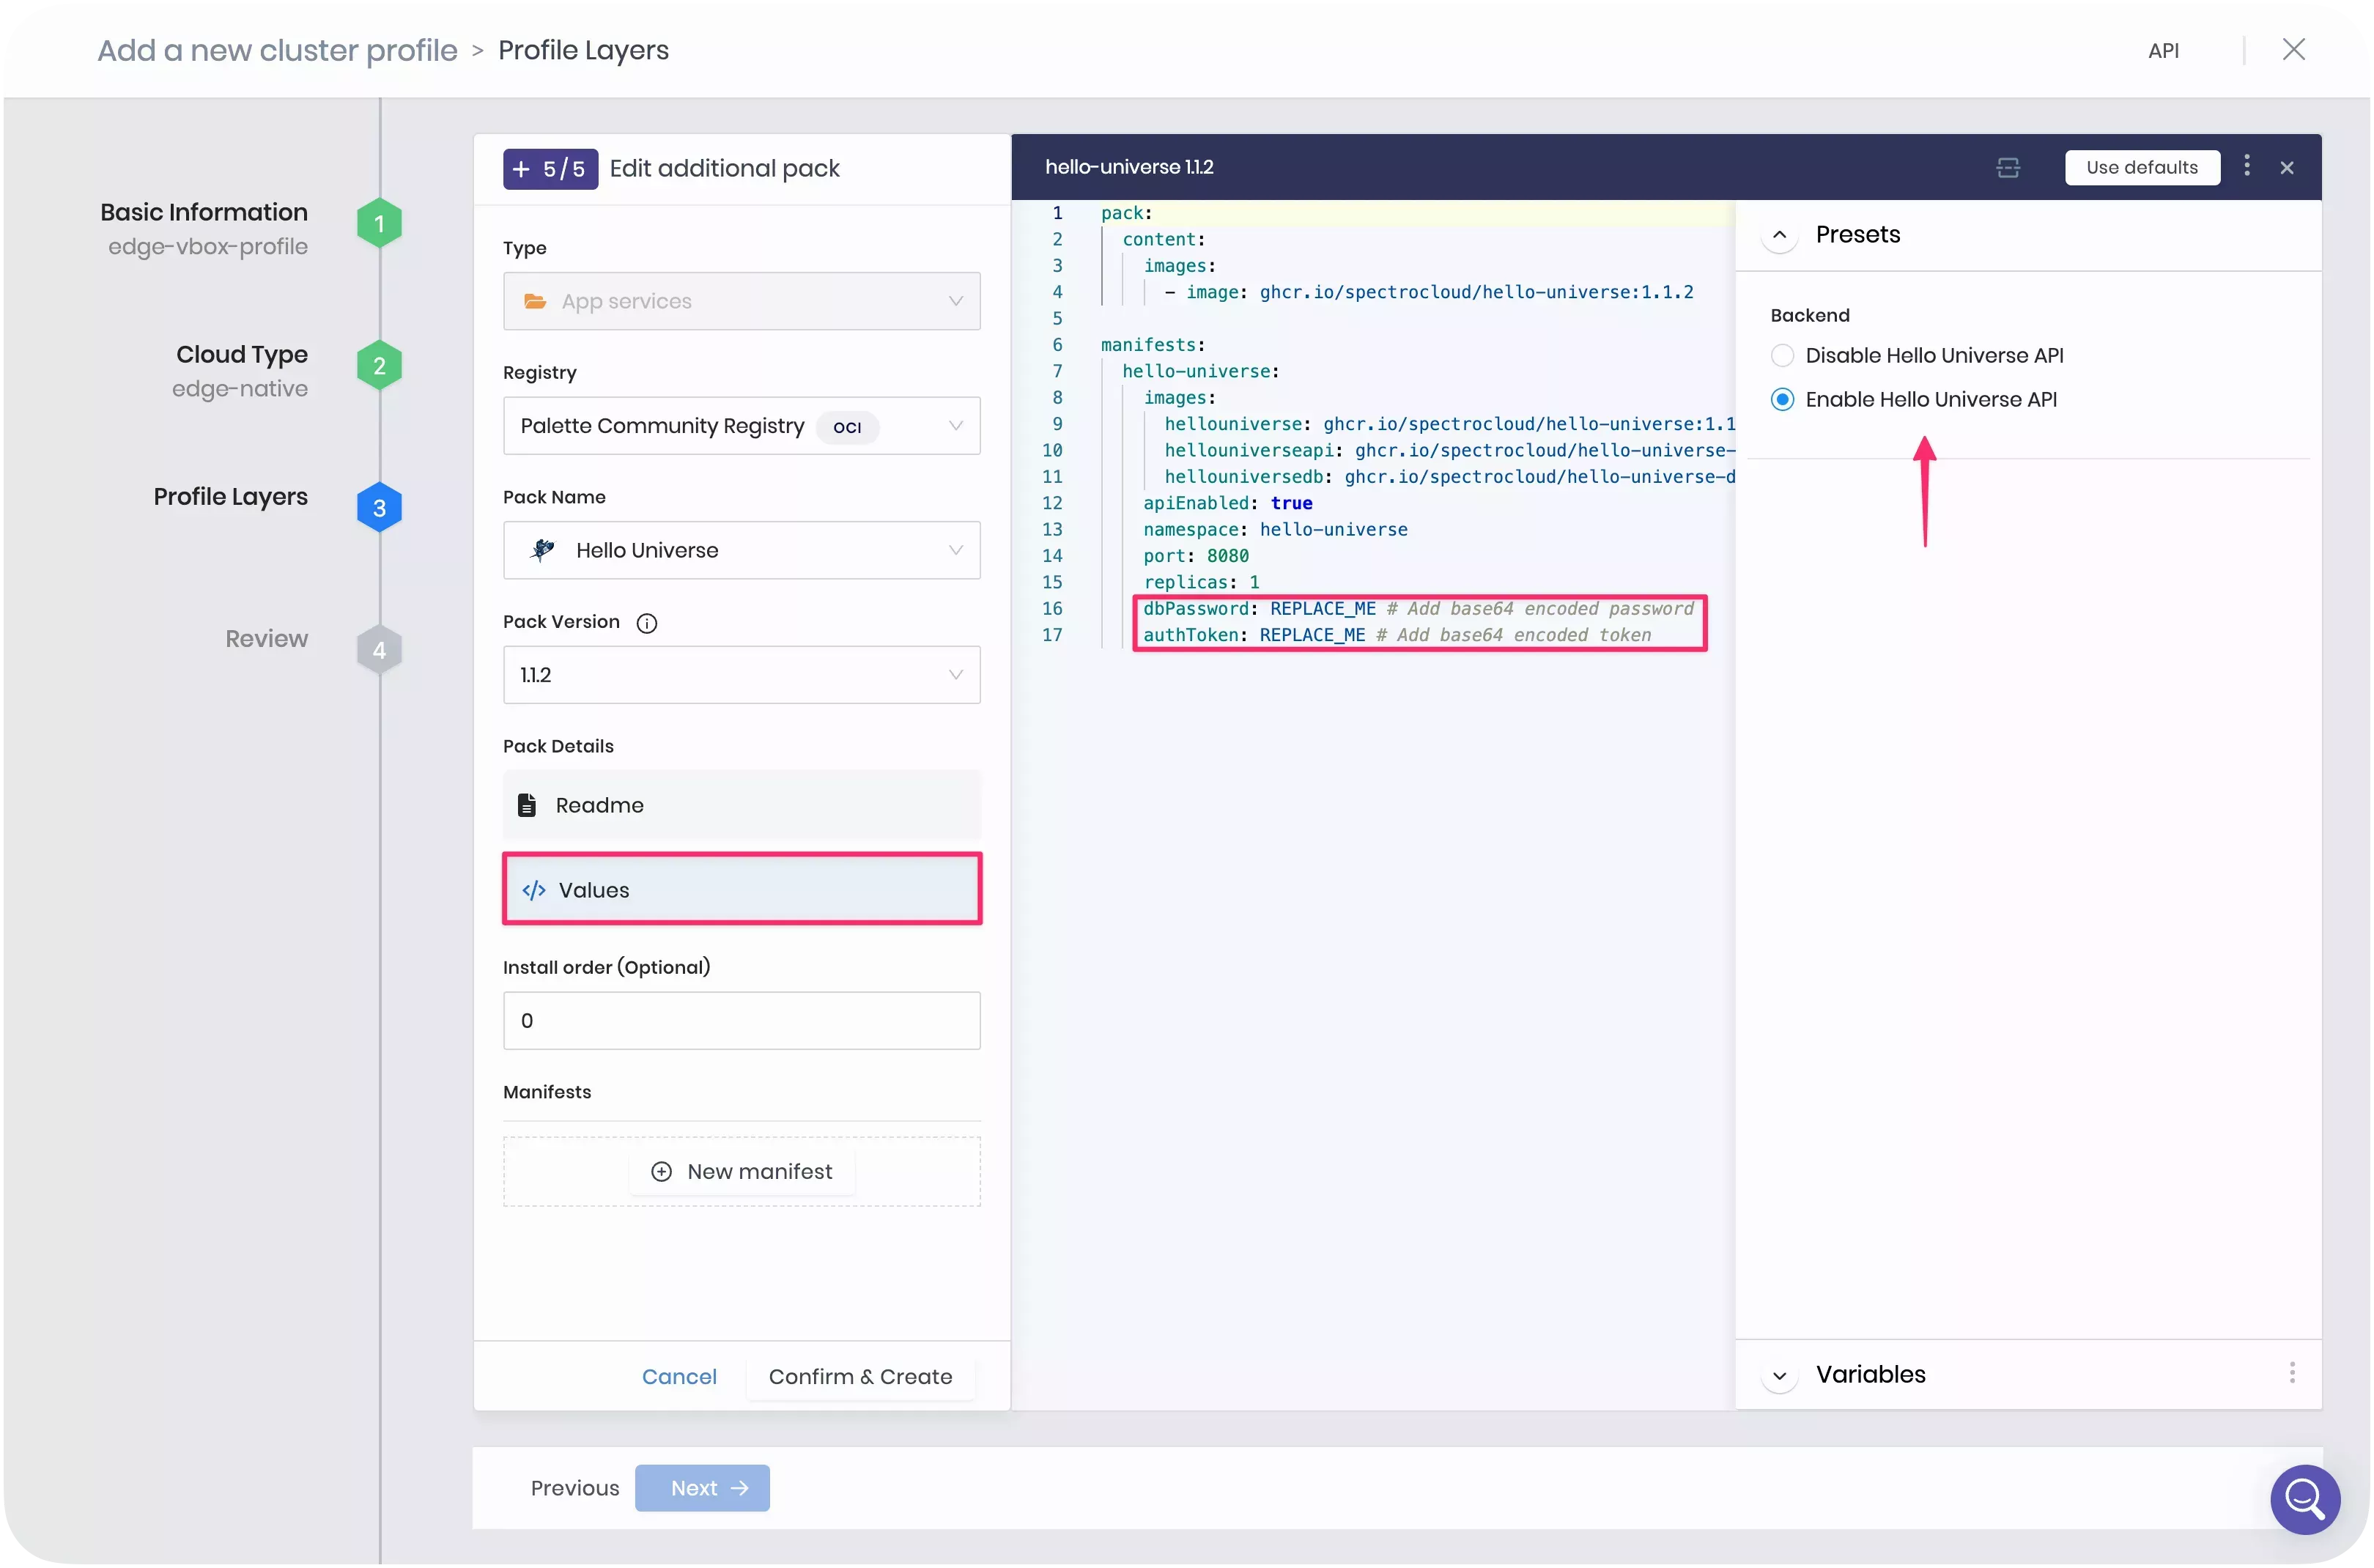
Click on Values under the Pack Details section. Next, click on Presets on the right-hand side.
This pack has two configured presets:
- Disable Hello Universe API configures the hello-universe application as a standalone front-end application. This is the default preset selection.
- Enable Hello Universe API configures the hello-universe application as a three-tier application with a frontend, API server, and Postgres database.
Select the Enable Hello Universe API preset. The pack manifest changes according to this preset.
The pack requires two values to be replaced for the authorization token and for the database password when using this preset. Replace these values with your own base64 encoded values. The hello-universe repository provides a token that you can use.
You can use the base64 command to create a base64 encoded value.
echo "mypassword" | base64
The output contains your base64 encoded value.
bXlwYXNzd29yZAo=
Click Confirm & Create to save the alterations and add the pack to your cluster profile.
Click Next. If there are no compatibility issues, Palette displays the cluster profile for review. Verify the layers you added are correct, and click on Finish Configuration to create the cluster profile.
Deploy VirtualBox VM
Once the Edge artifacts and cluster profile have been created, proceed to the VM deployment. The VirtualBox VM will use the Installer ISO to bootstrap the Edge installation and serve as the Edge host for your cluster.
Launch the VirtualBox application and click New to create a new VM.
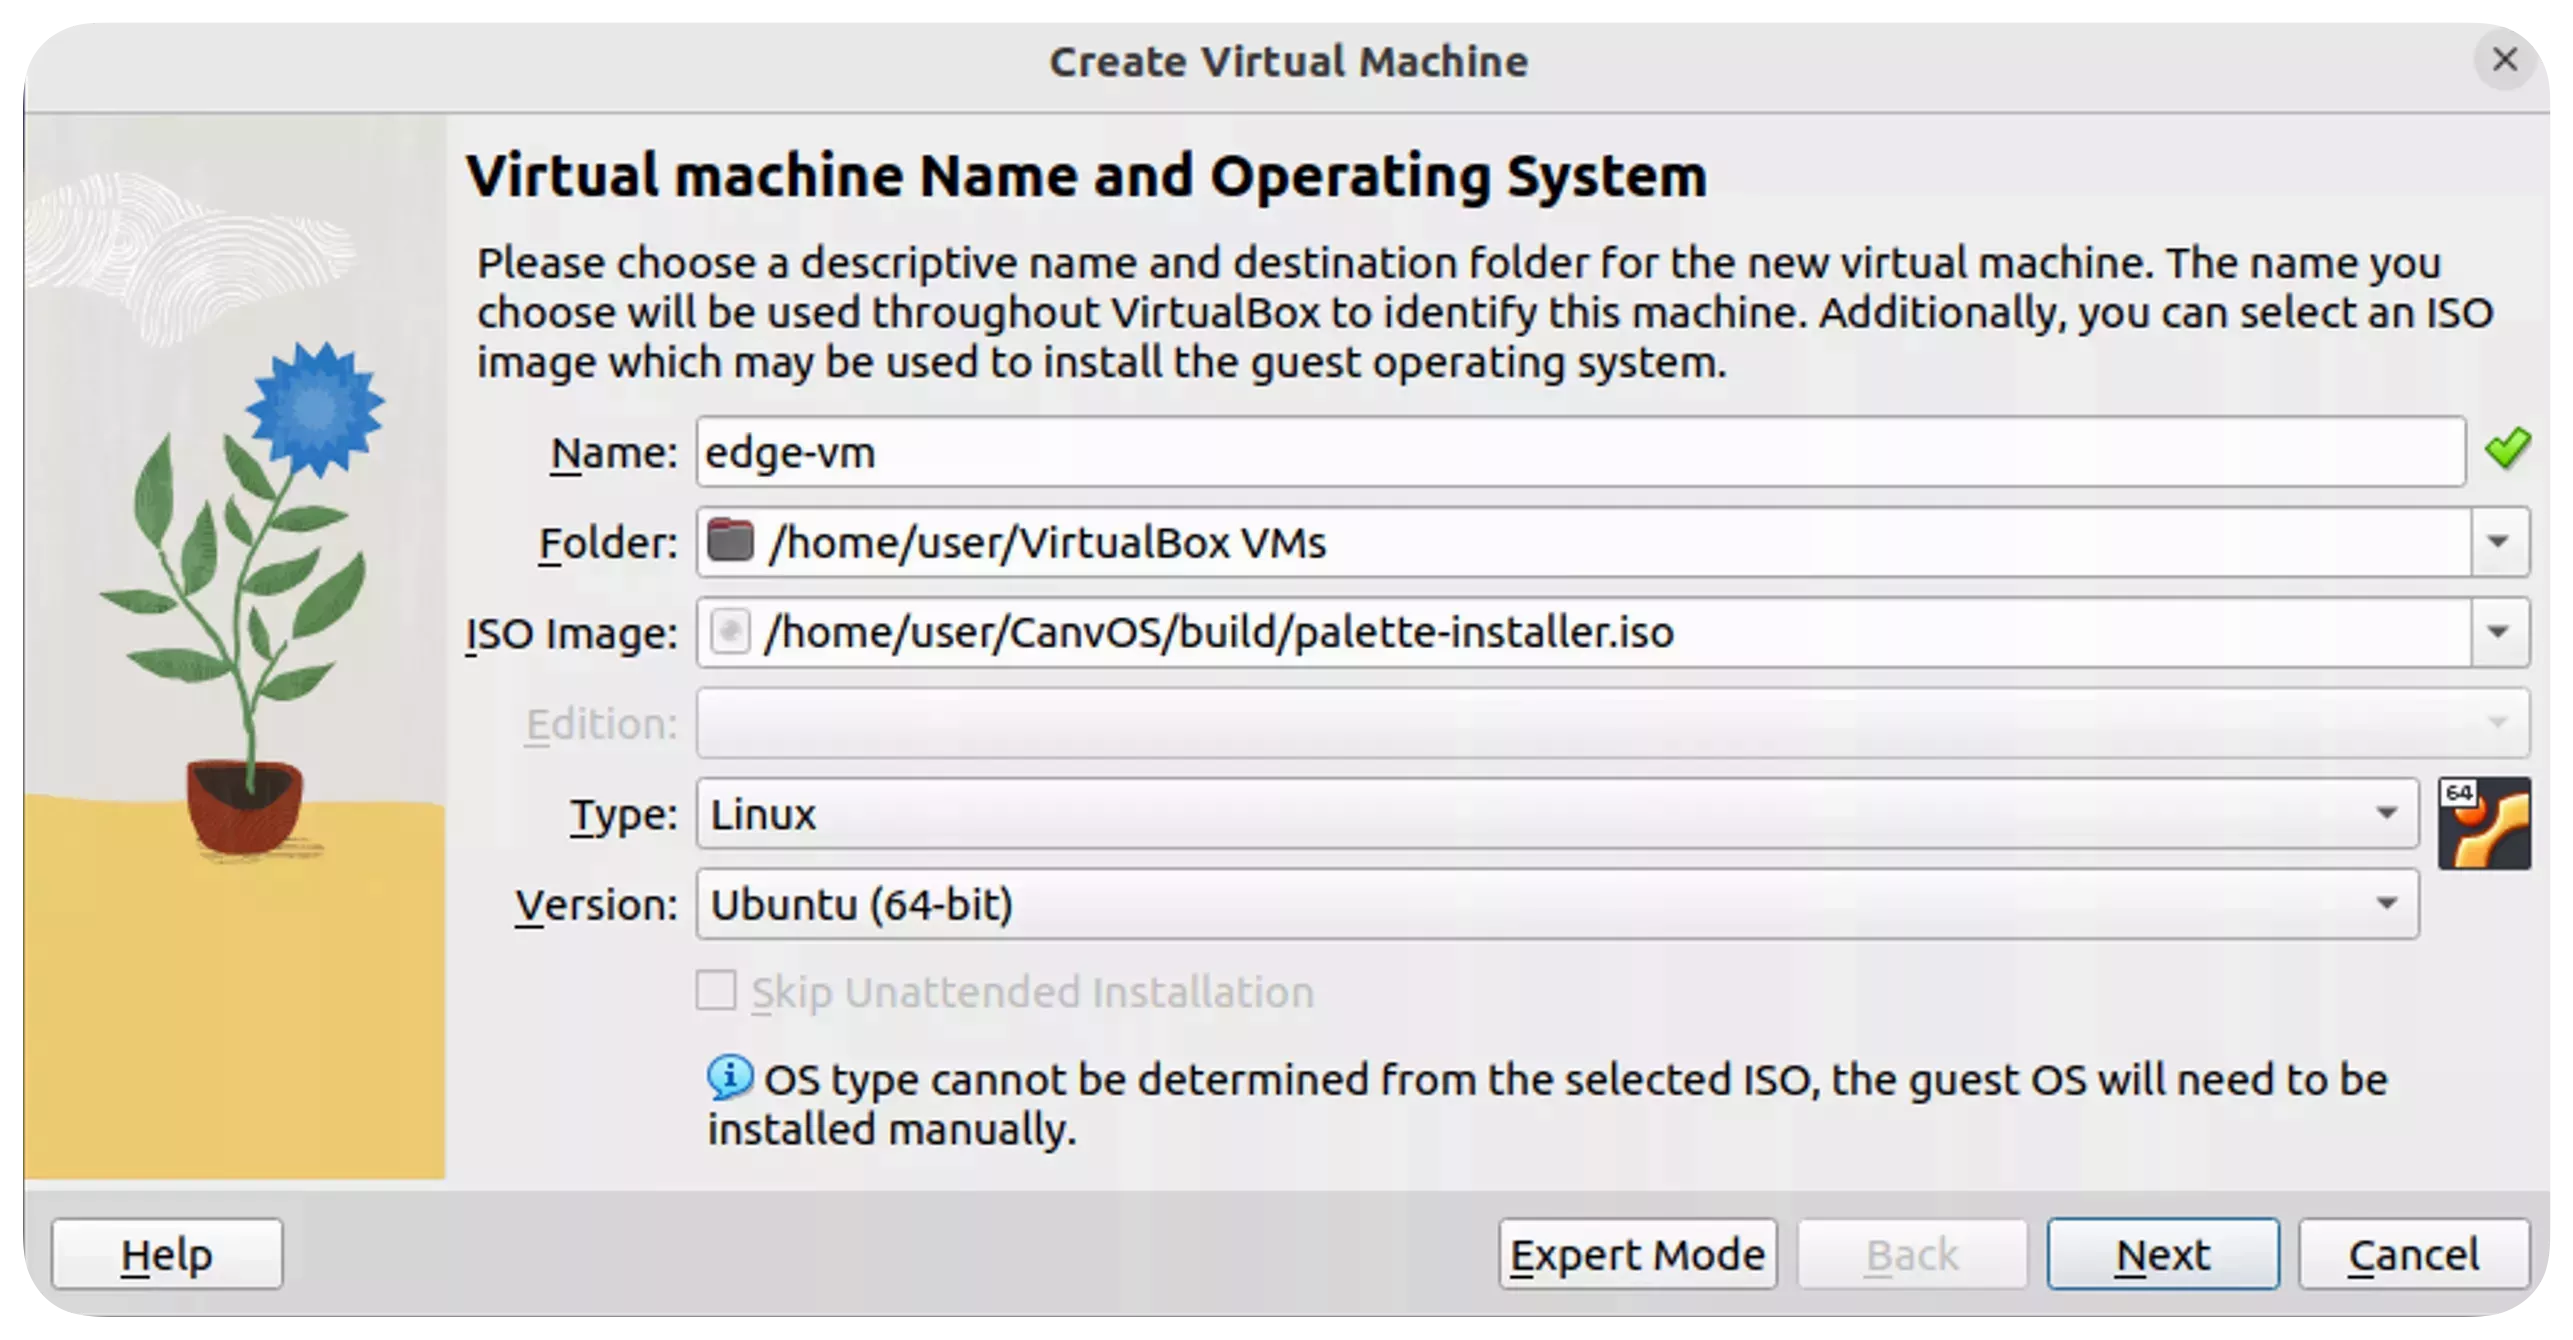
Give the machine a name, for example, edge-vm.
In the ISO Image field, select the Edge Installer ISO file you built in the
Build Edge Artifacts section. The ISO file is stored in the CanvOS/build folder.
Set the machine Type as Linux and the Version as Ubuntu (64-bit), and click Next.
Adjust the Base Memory to 8000 MB and Processors to 2 CPU. Click Next to proceed.
Set the Disk Size to 100 GB and ensure the option Pre-Allocate Full Size is not checked. Click Next.
These are the minimum hardware requirements for an Edge host. In production environments, the required configuration may vary.
Confirm the VM settings and click Finish to create the VM.
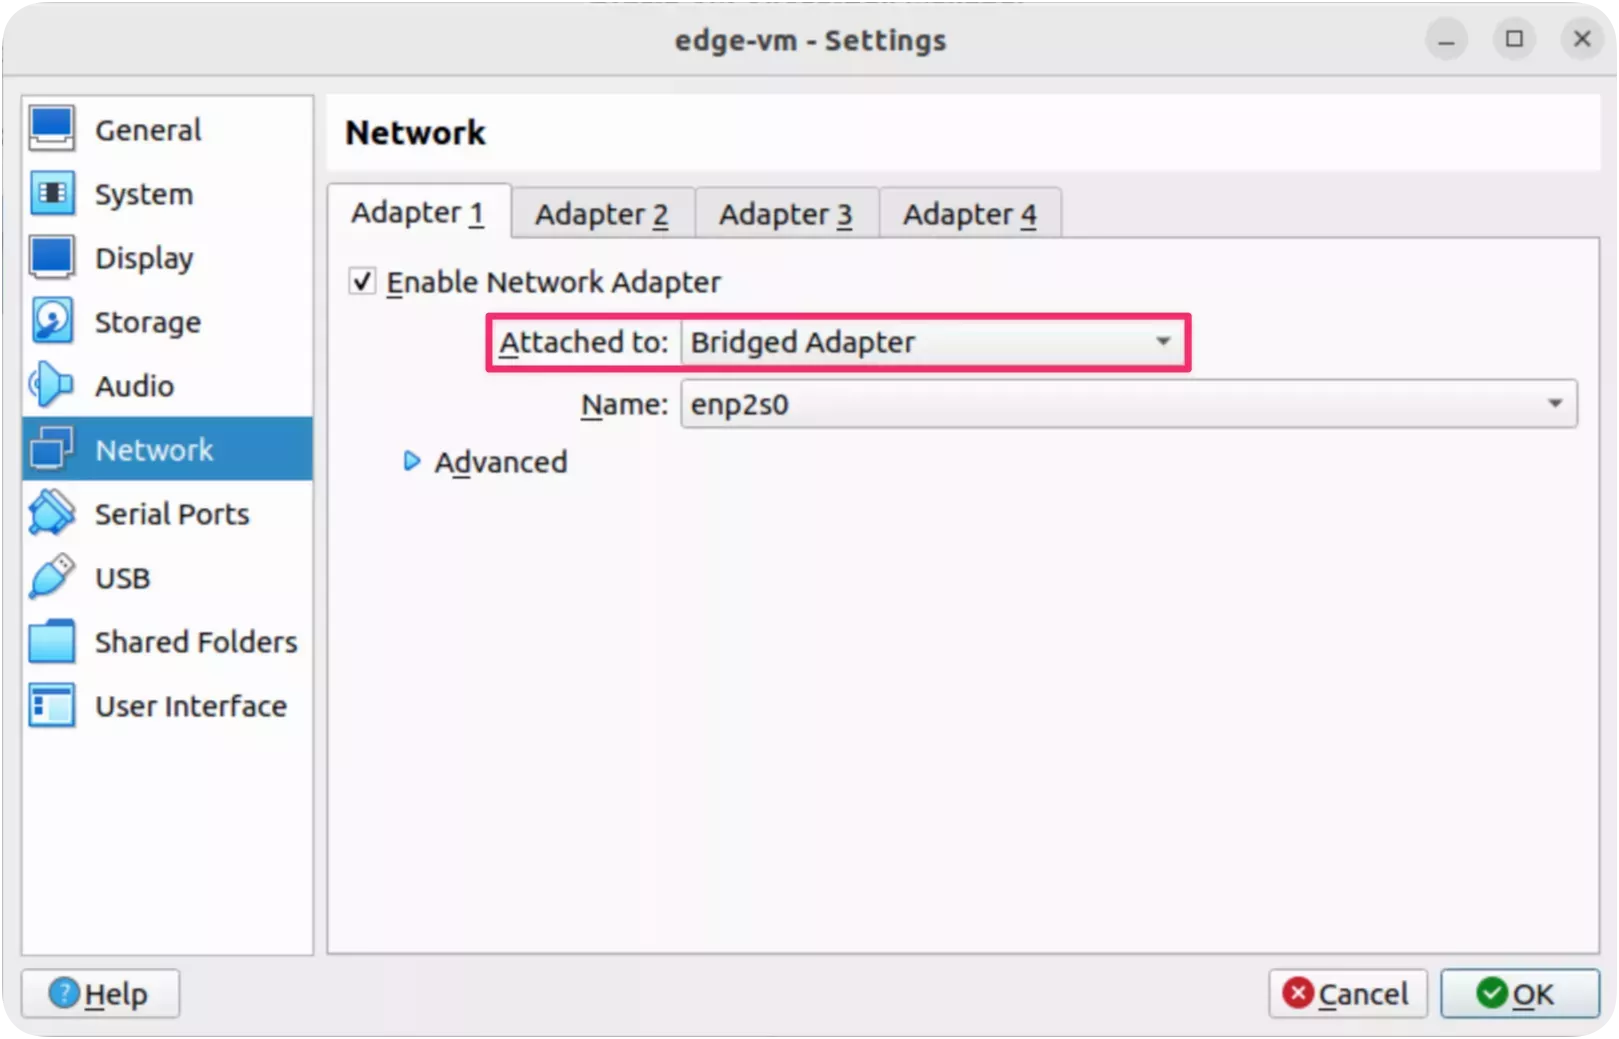
Select the VM to adjust its network settings. Click Settings and select Network.
Change the Attached to: option from NAT to Bridged Adapter so that the VM can receive an IP address from the
same network as the host machine's network. Click OK.
Prepare Edge Host
Install Palette Edge
In VirtualBox, select the created VM and click Start to turn it on. The Edge Installer will bootstrap the Palette Edge installation onto the VM.
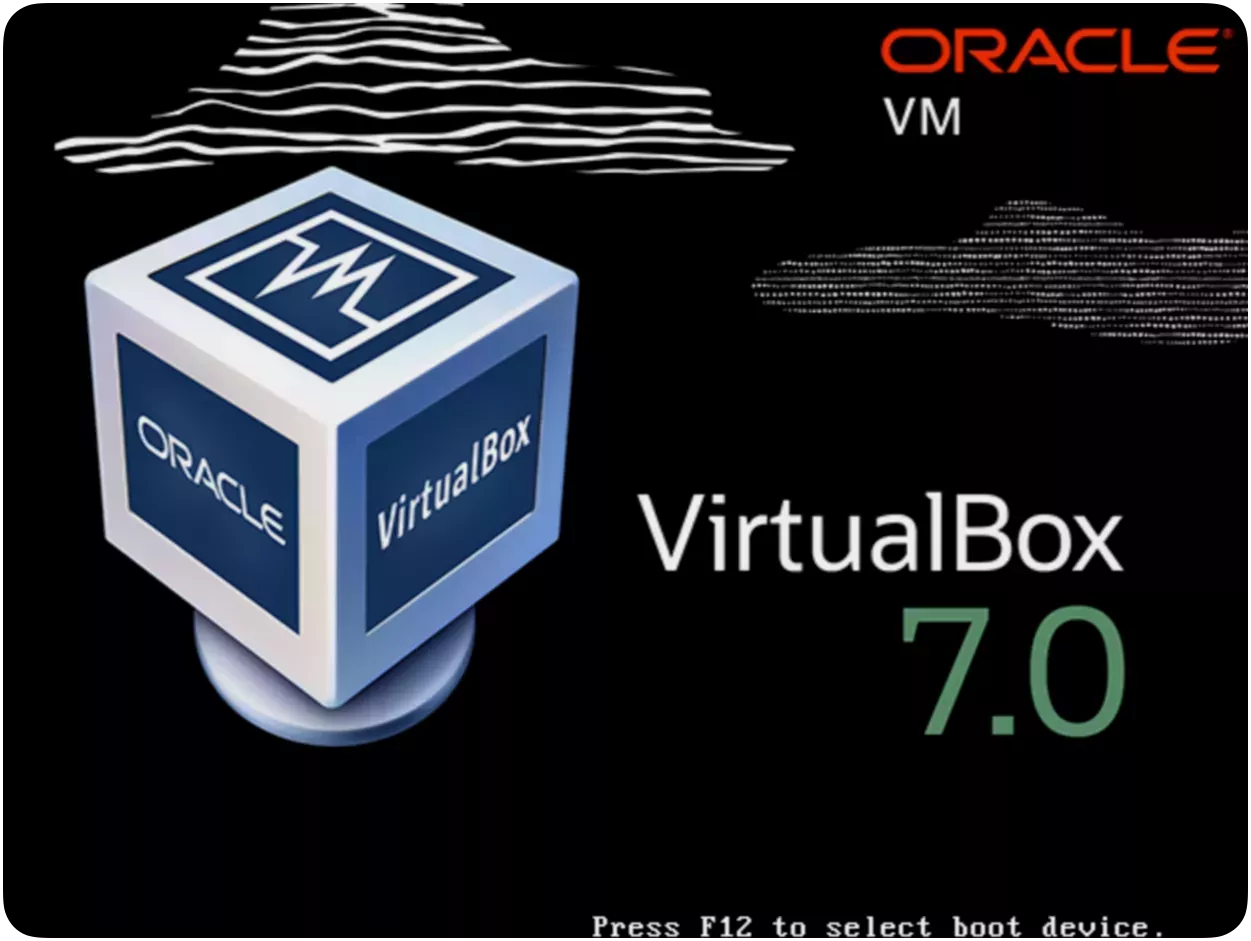
Wait for the Edge Installer to complete copying content to the VM, which may take a few minutes. The VM will reboot upon completion. Ensure that you stop the VM before the reboot proceeds.
When the image below appears for the second time, right-click the VM, select Stop, and then click Power Off to turn it off.
Next, click Settings and select Storage.
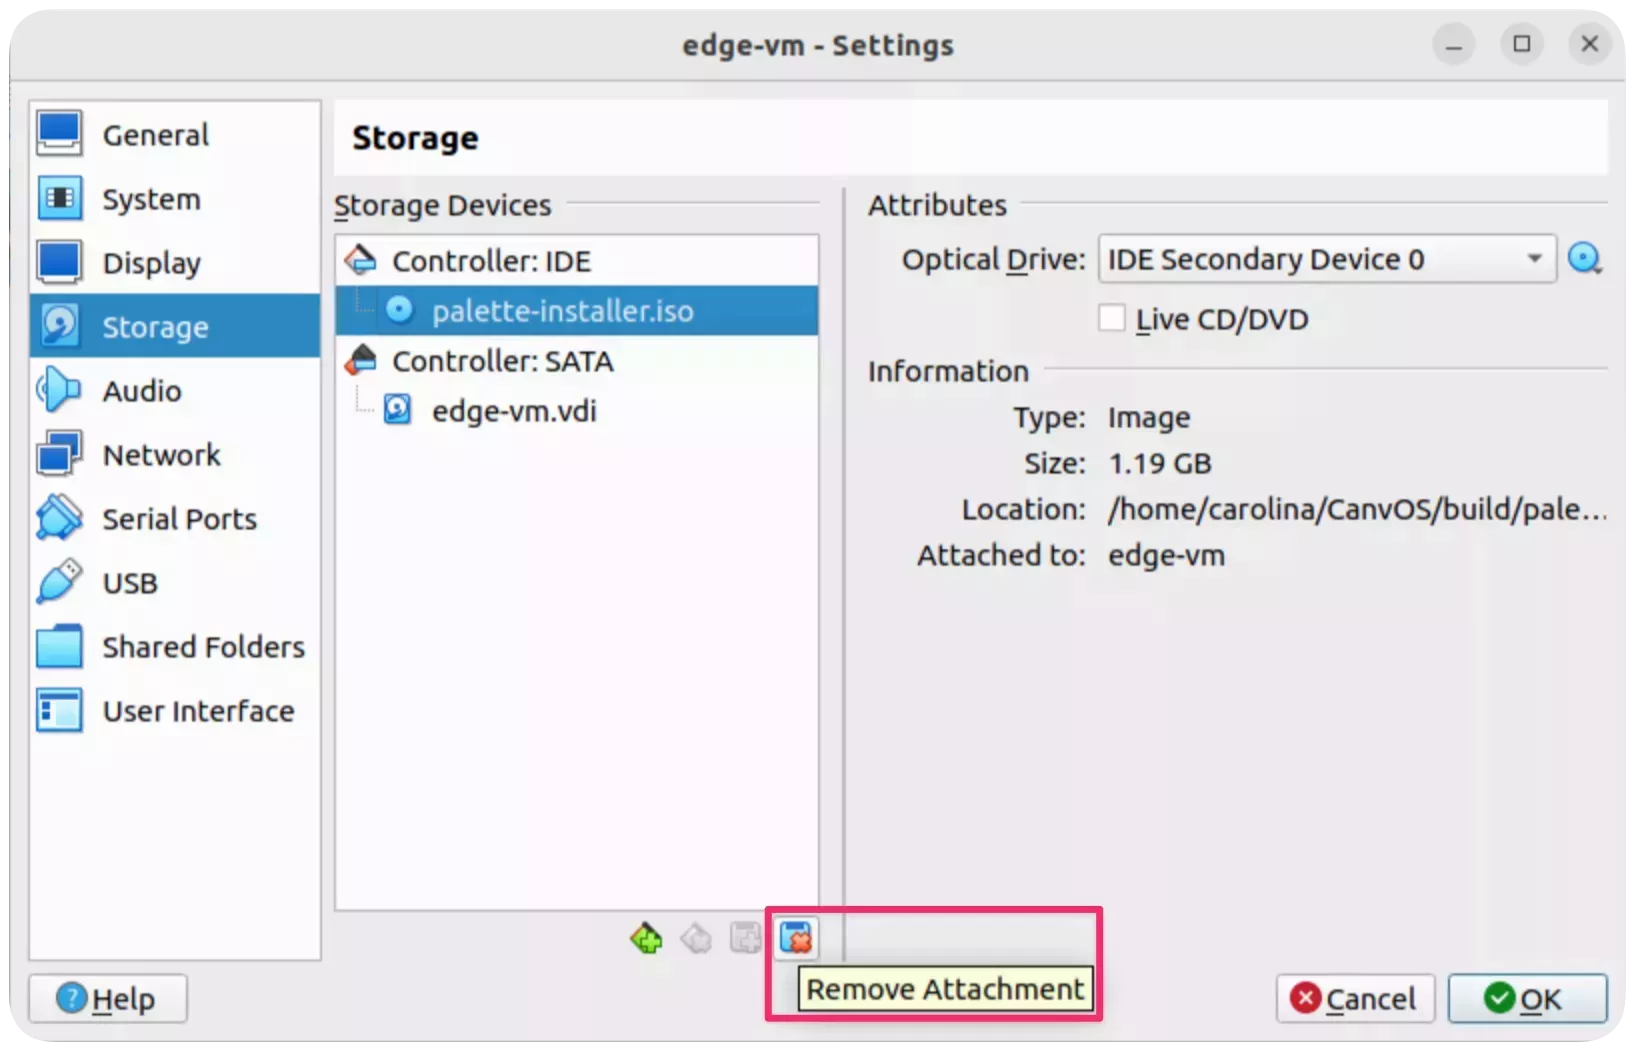
Select the Edge Installer ISO and click Remove Attachment to remove it from your VM. Confirm the deletion with Remove and click OK to close the settings window.
Register Edge Host
Select the VirtualBox VM you created and click Start to turn it on. The VM will boot and get an IP address from the bridged network of the host machine. This address should be on the same subnet as the host machine.
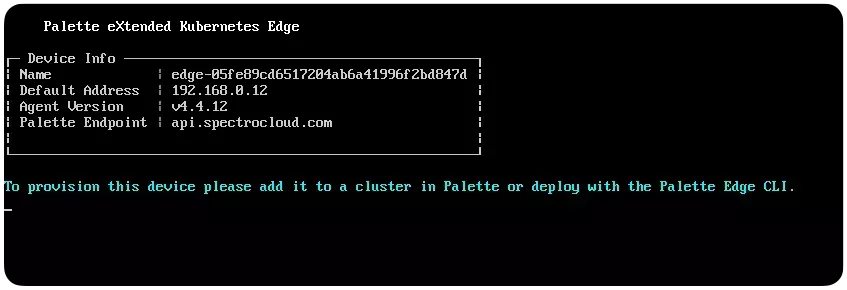
After a few minutes, the VM screen displays an IP address and registers automatically in Palette as an Edge host using the provided Palette registration token.
Validate the Edge Host Registration
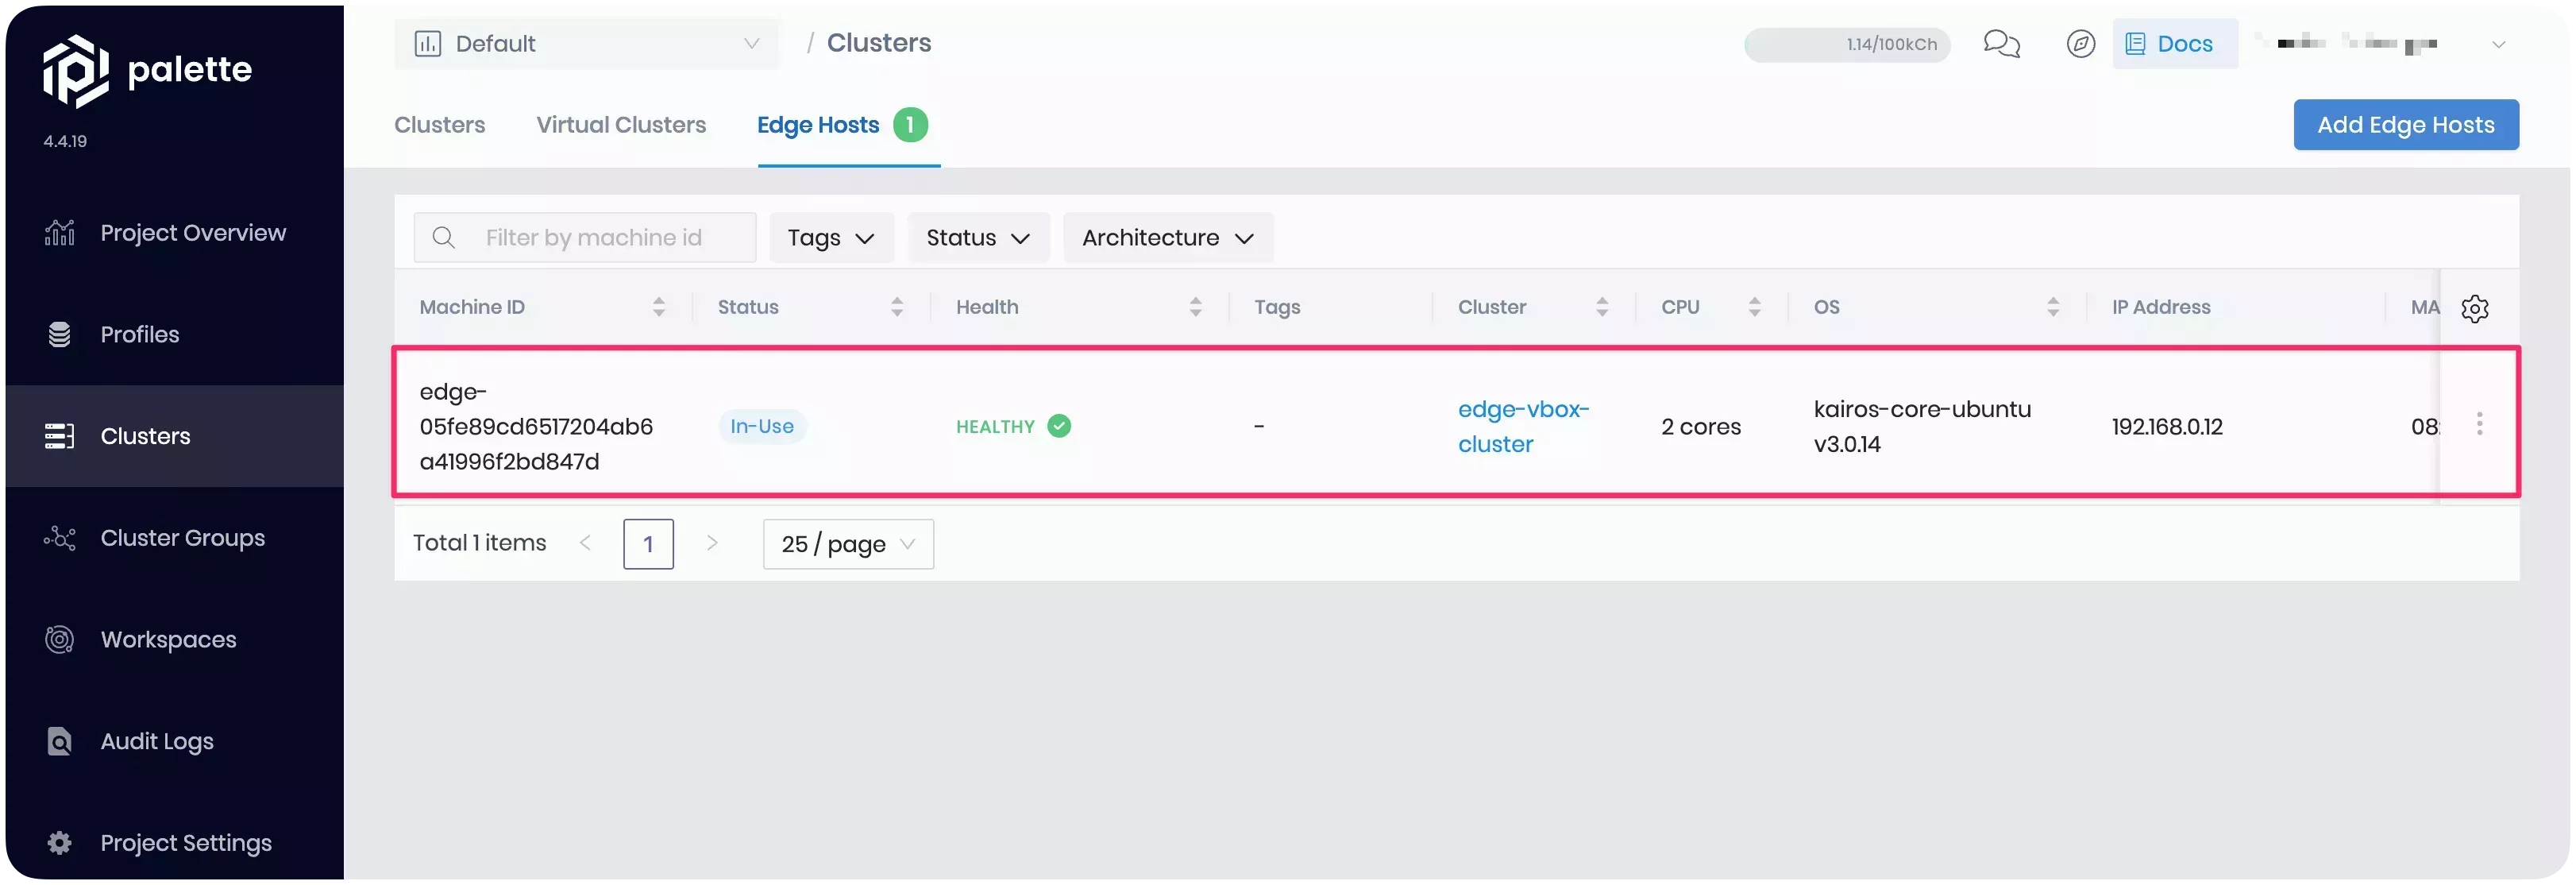
Navigate back to Palette. Then, select Clusters from the left Main Menu. Click on the Edge Hosts tab to view the registered hosts.
Confirm your Edge host is listed as Healthy and with a Ready status. The Machine ID should match the ID displayed on your VM's screen.
Deploy Edge Cluster
From the left Main Menu, select Clusters, then click Create Cluster. If you already have clusters deployed, click Add New Cluster instead. Ensure you are in the Default project.
Palette will prompt you to select the type of cluster. Select Edge Native and click the Start Edge Native Configuration button.
In the Basic Information section, assign the name edge-vbox-cluster, a brief cluster description, and assign the tag env:edge. Click Next.
In the Cluster Profile section, click Add Cluster Profile. Select the cluster profile you created earlier in this tutorial and click Confirm.
Review the cluster profile layers, then click Next to proceed.
In the Cluster Config section, provide a Virtual IP (VIP) address for the Edge cluster. This address must be an unused address on the same network as your Edge host.
You can use the nmap tool to scan your network and check which IP addresses are in
use. Issue the following command in your terminal, replacing the example CIDR 192.168.0.0/24 with your network's CIDR.
nmap -sn 192.168.0.0/24
The output displays the IP addresses that are currently in use on your network.
Optionally, you can also select an SSH key to access the cluster's nodes and a Network Time Protocol (NTP) server list.
Click Next to continue.
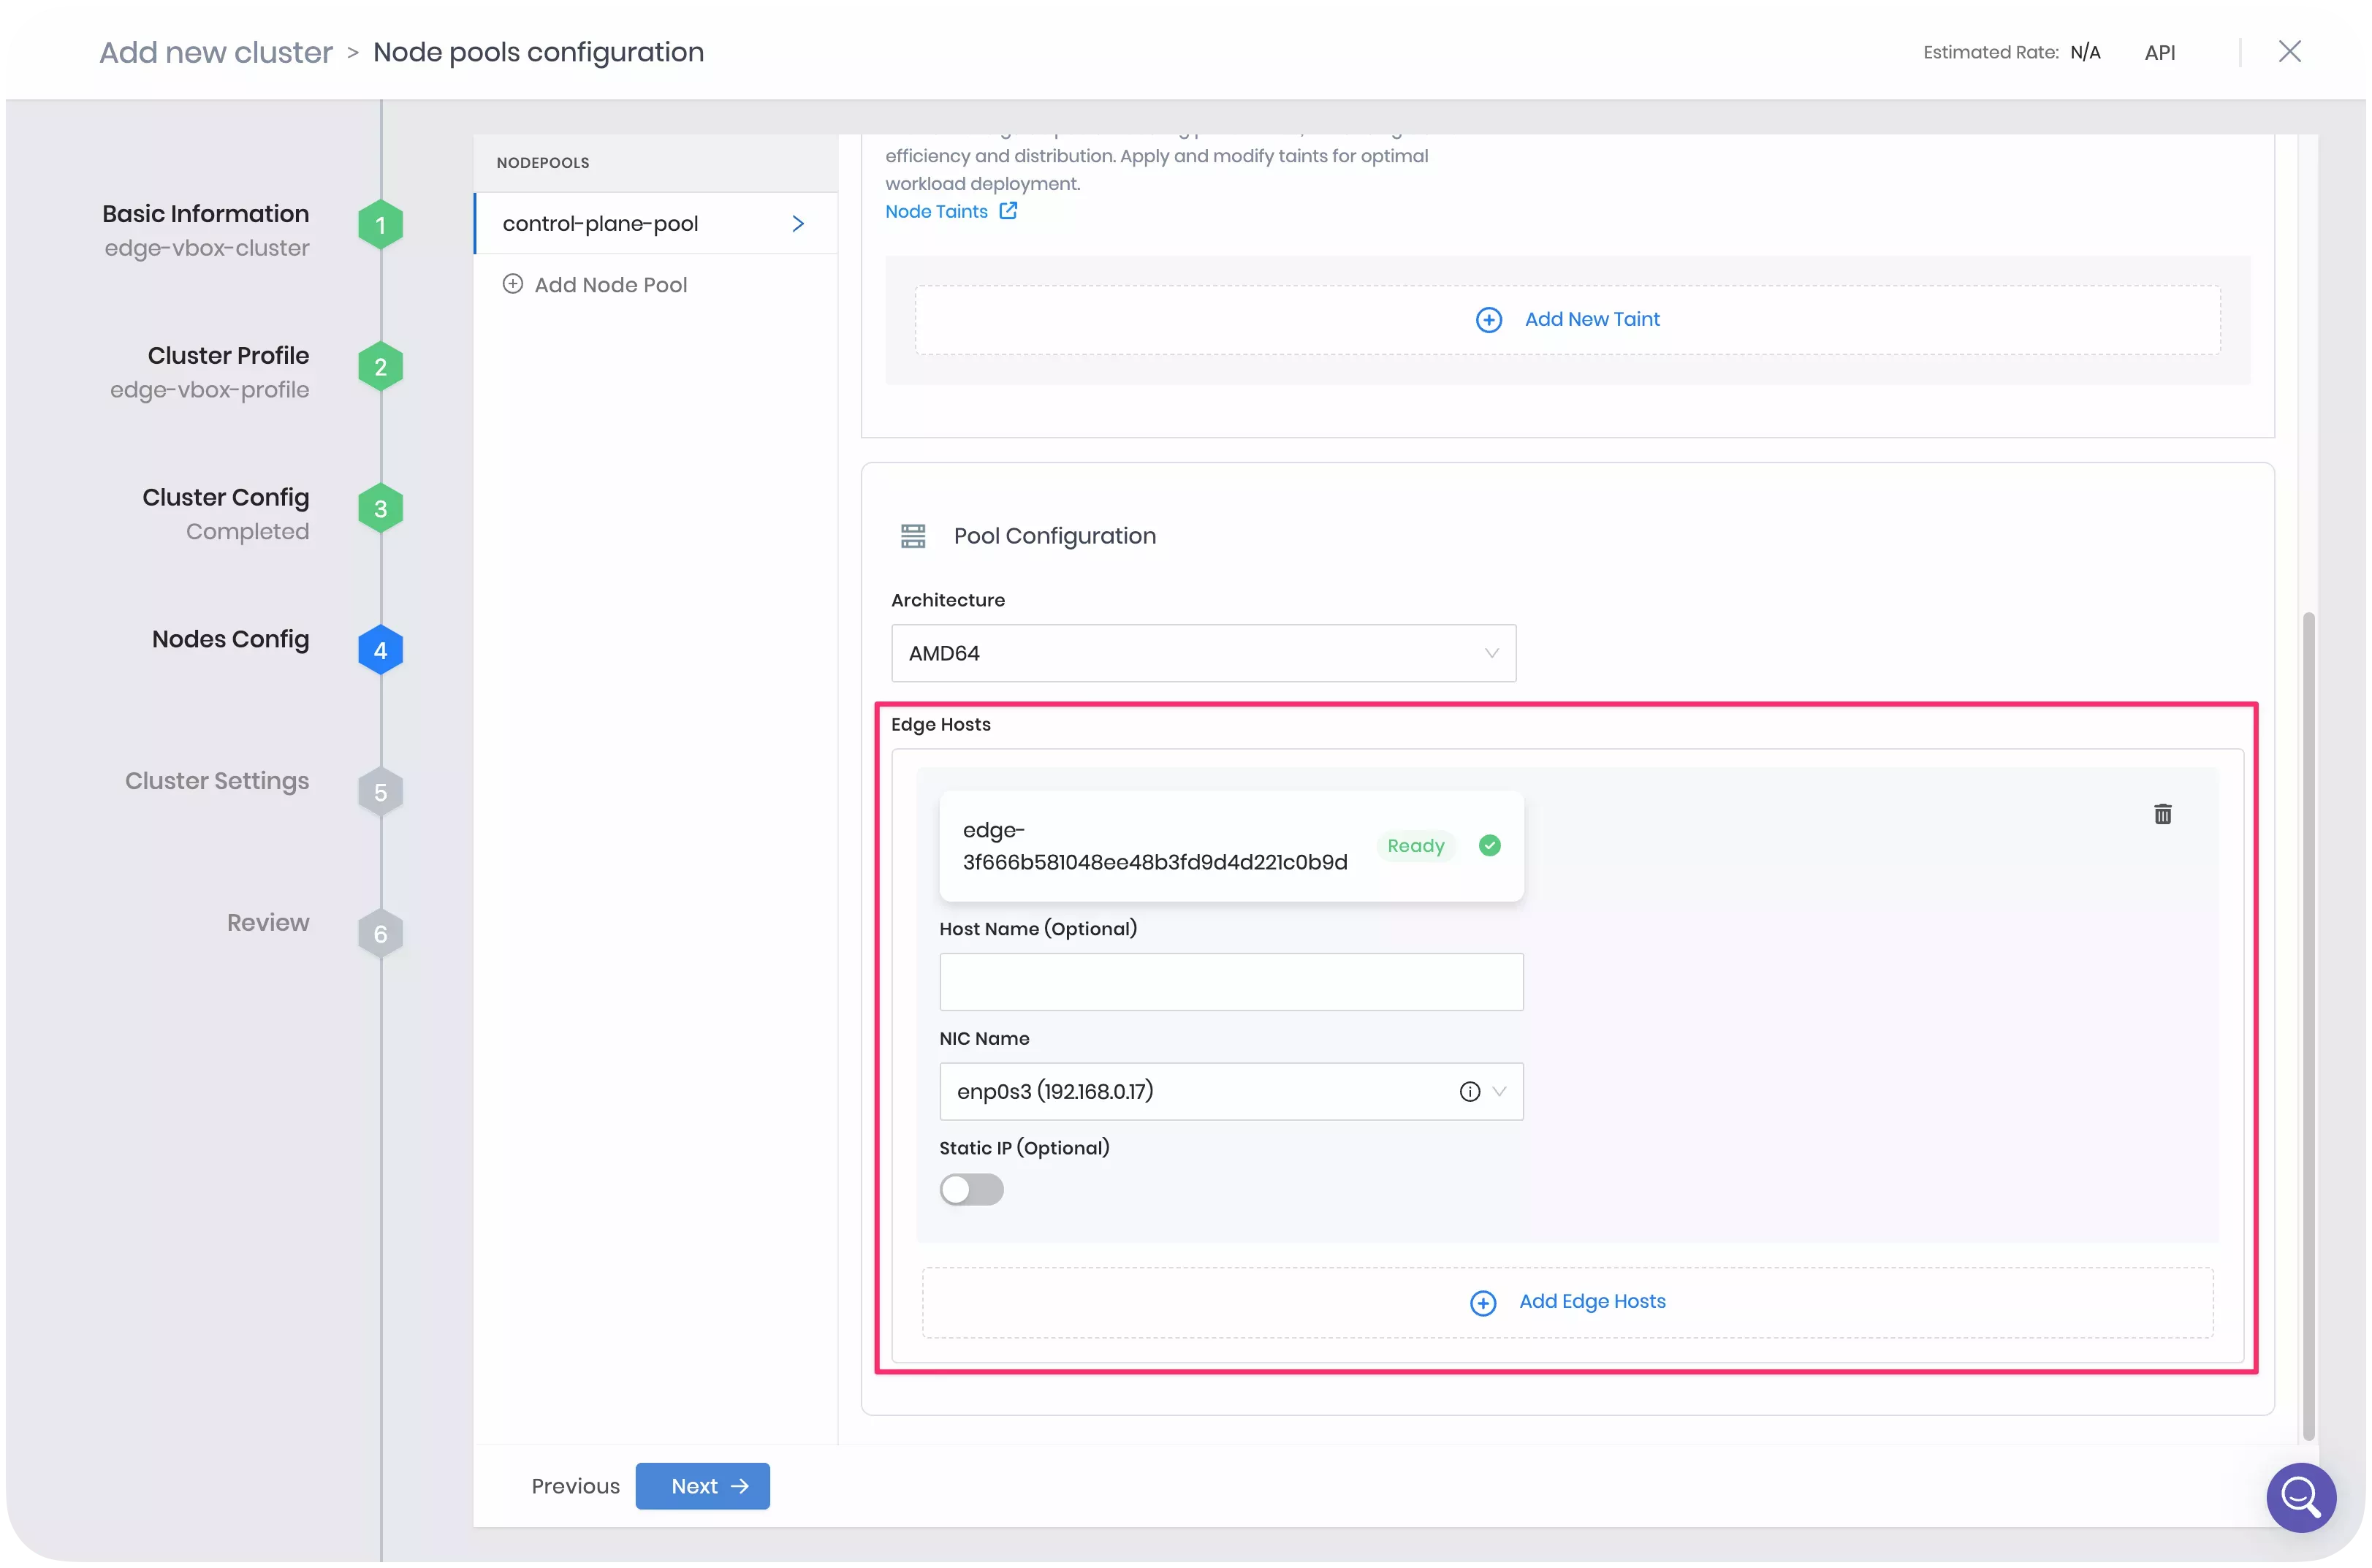
In the Nodes Config section, specify what Edge hosts make up the Edge cluster. This tutorial deploys a single-node Edge cluster with no worker pools.
Provide the following details for the control plane pool.
| Field | Value |
|---|---|
| Node pool name | control-plane-pool |
| Allow worker capability | Yes |
| Additional Labels (Optional) | None |
| Taints | None |
| Pool Configuration > Edge Hosts | Choose the registered Edge hosts you created in the Register Edge Host section of this tutorial. Palette automatically displays the NIC Name for the selected host. |
Next, click Remove to delete the worker pool and click Next to proceed with the cluster deployment.
The Cluster Settings section provides advanced options for OS patching, scheduled scans, scheduled backups, and cluster role binding. For this tutorial, you can use the default settings. Click on Validate to continue.
Finally, the Review section allows you to review the cluster configuration. If everything looks correct, click Finish Configuration to deploy the cluster.
The cluster deployment can take 15 to 30 minutes, depending on its configuration. You can click on the Events tab to visualize the event log and learn more about the deployment progress.
Validate
In Palette, select Clusters from the left Main Menu.
Next, click on your cluster to view its Overview tab.
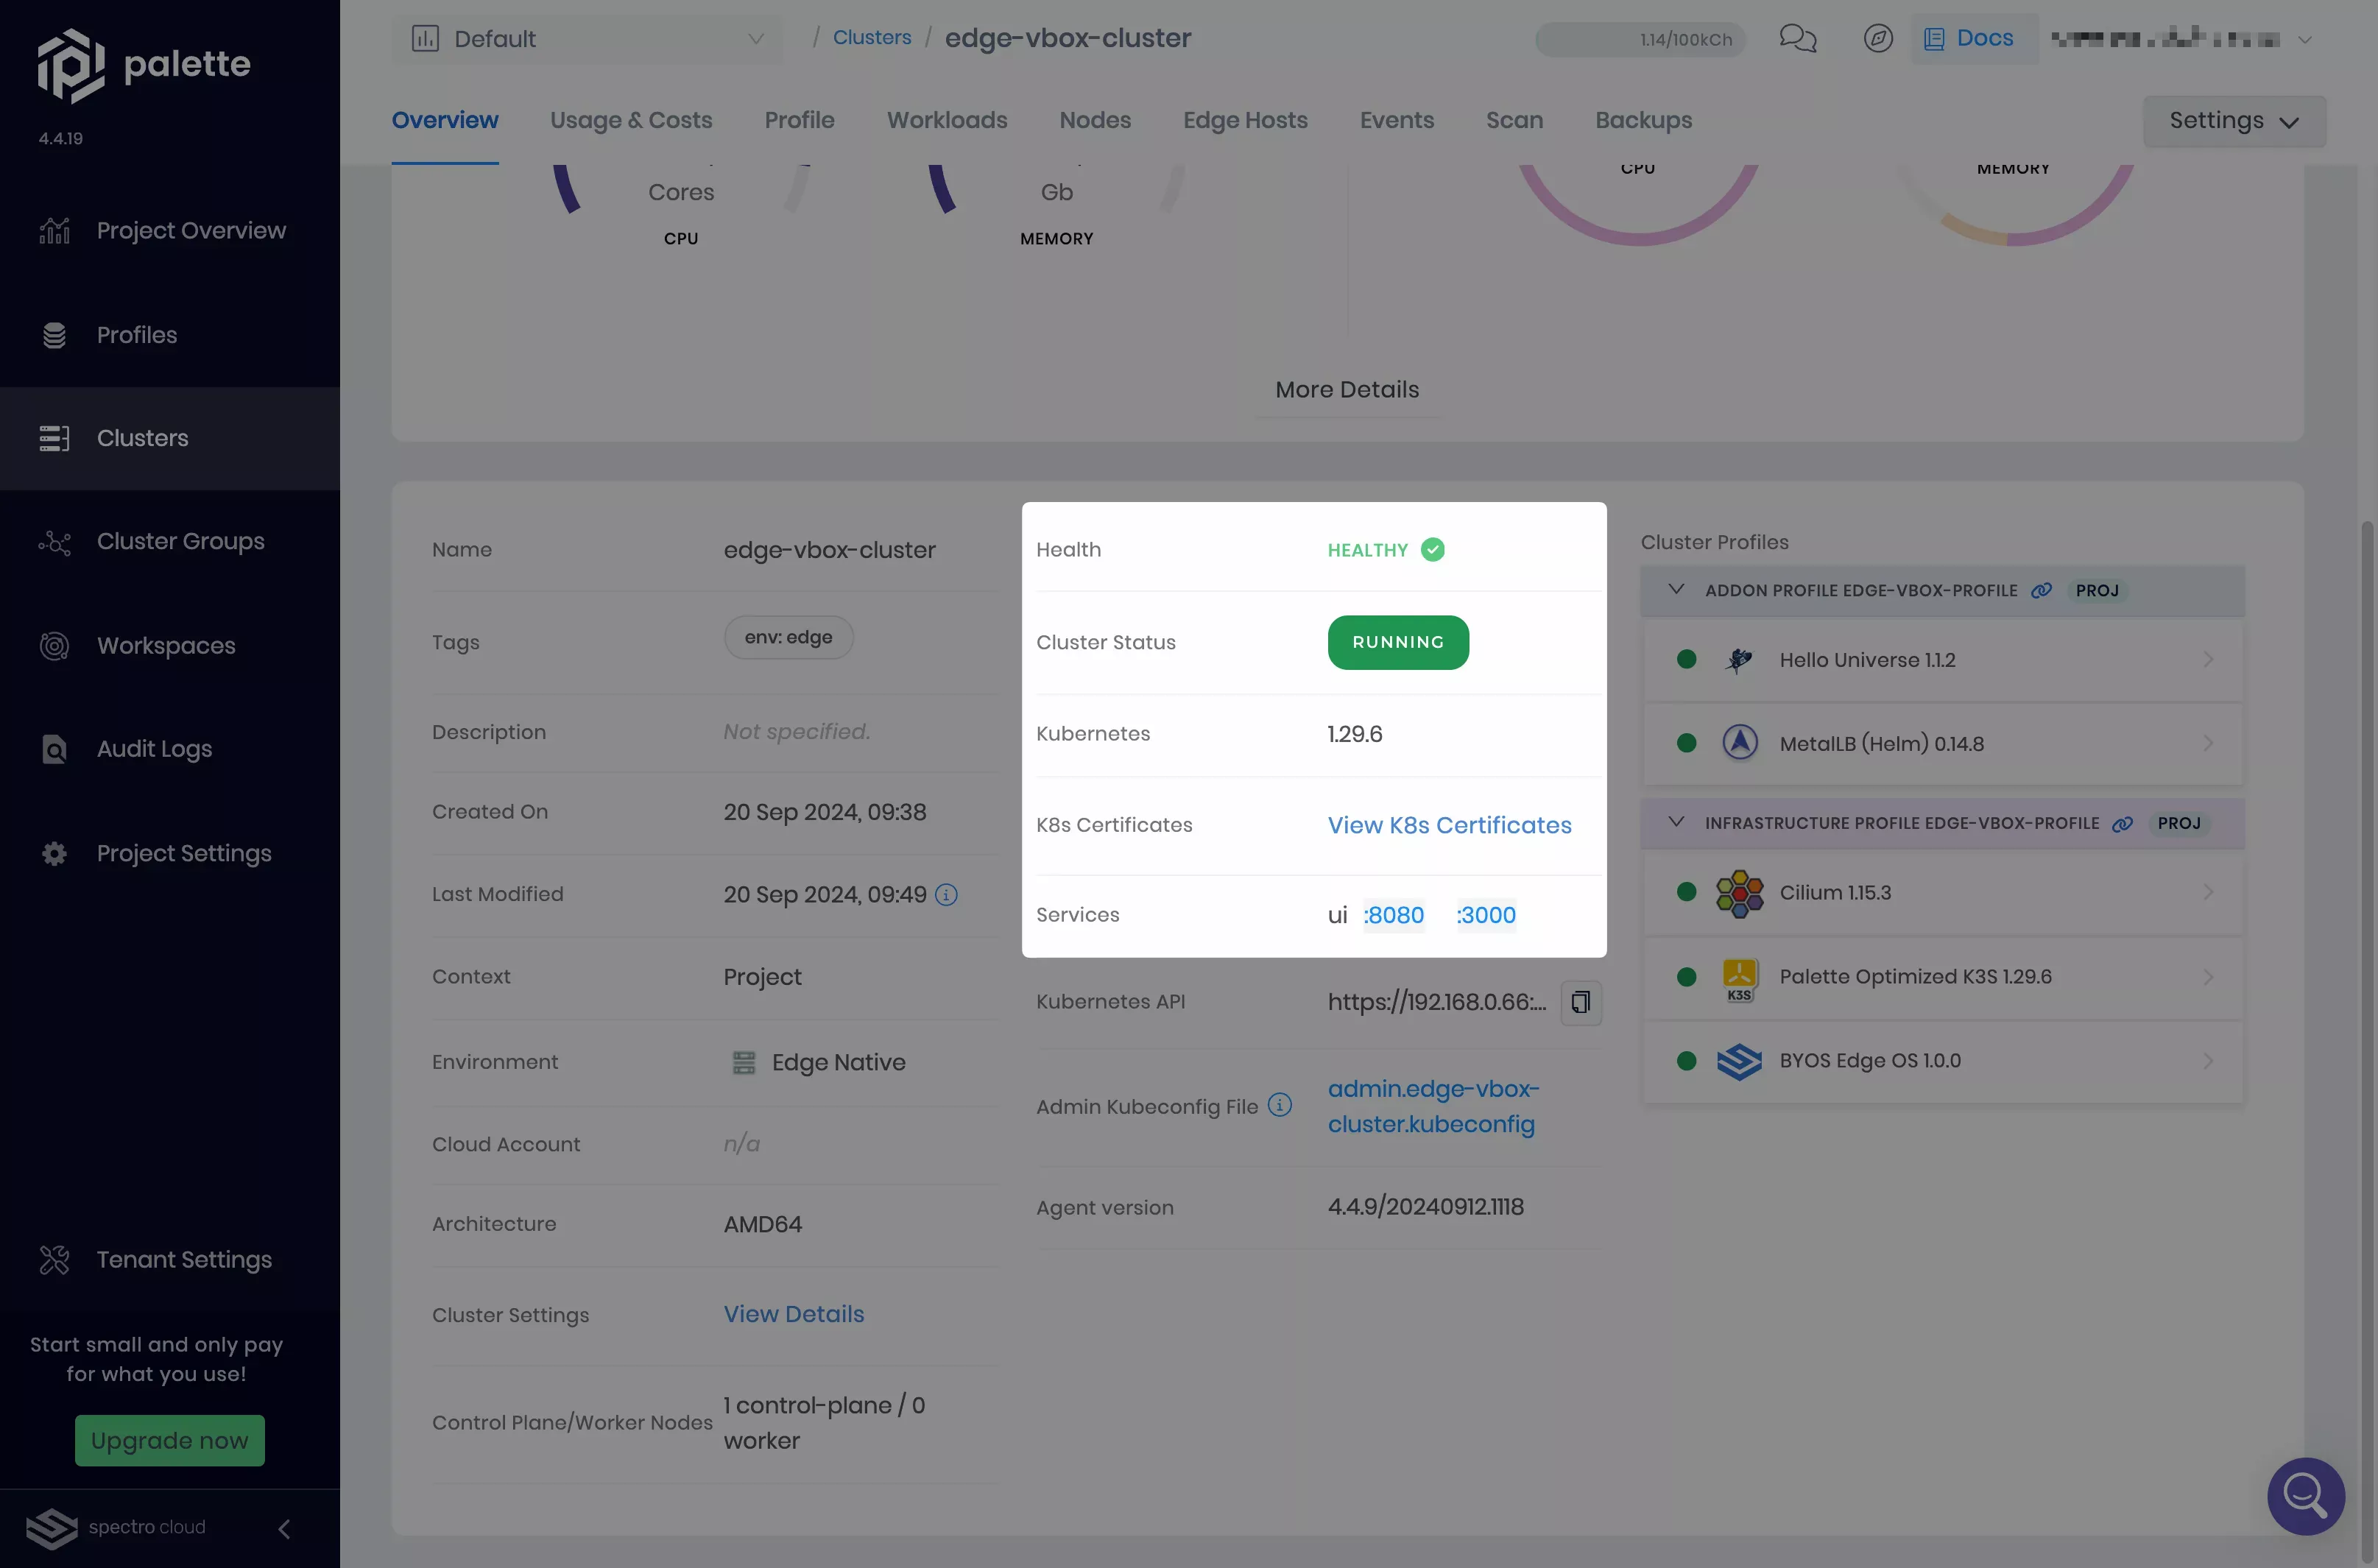
Confirm that your cluster has a Running status and is listed as Healthy.
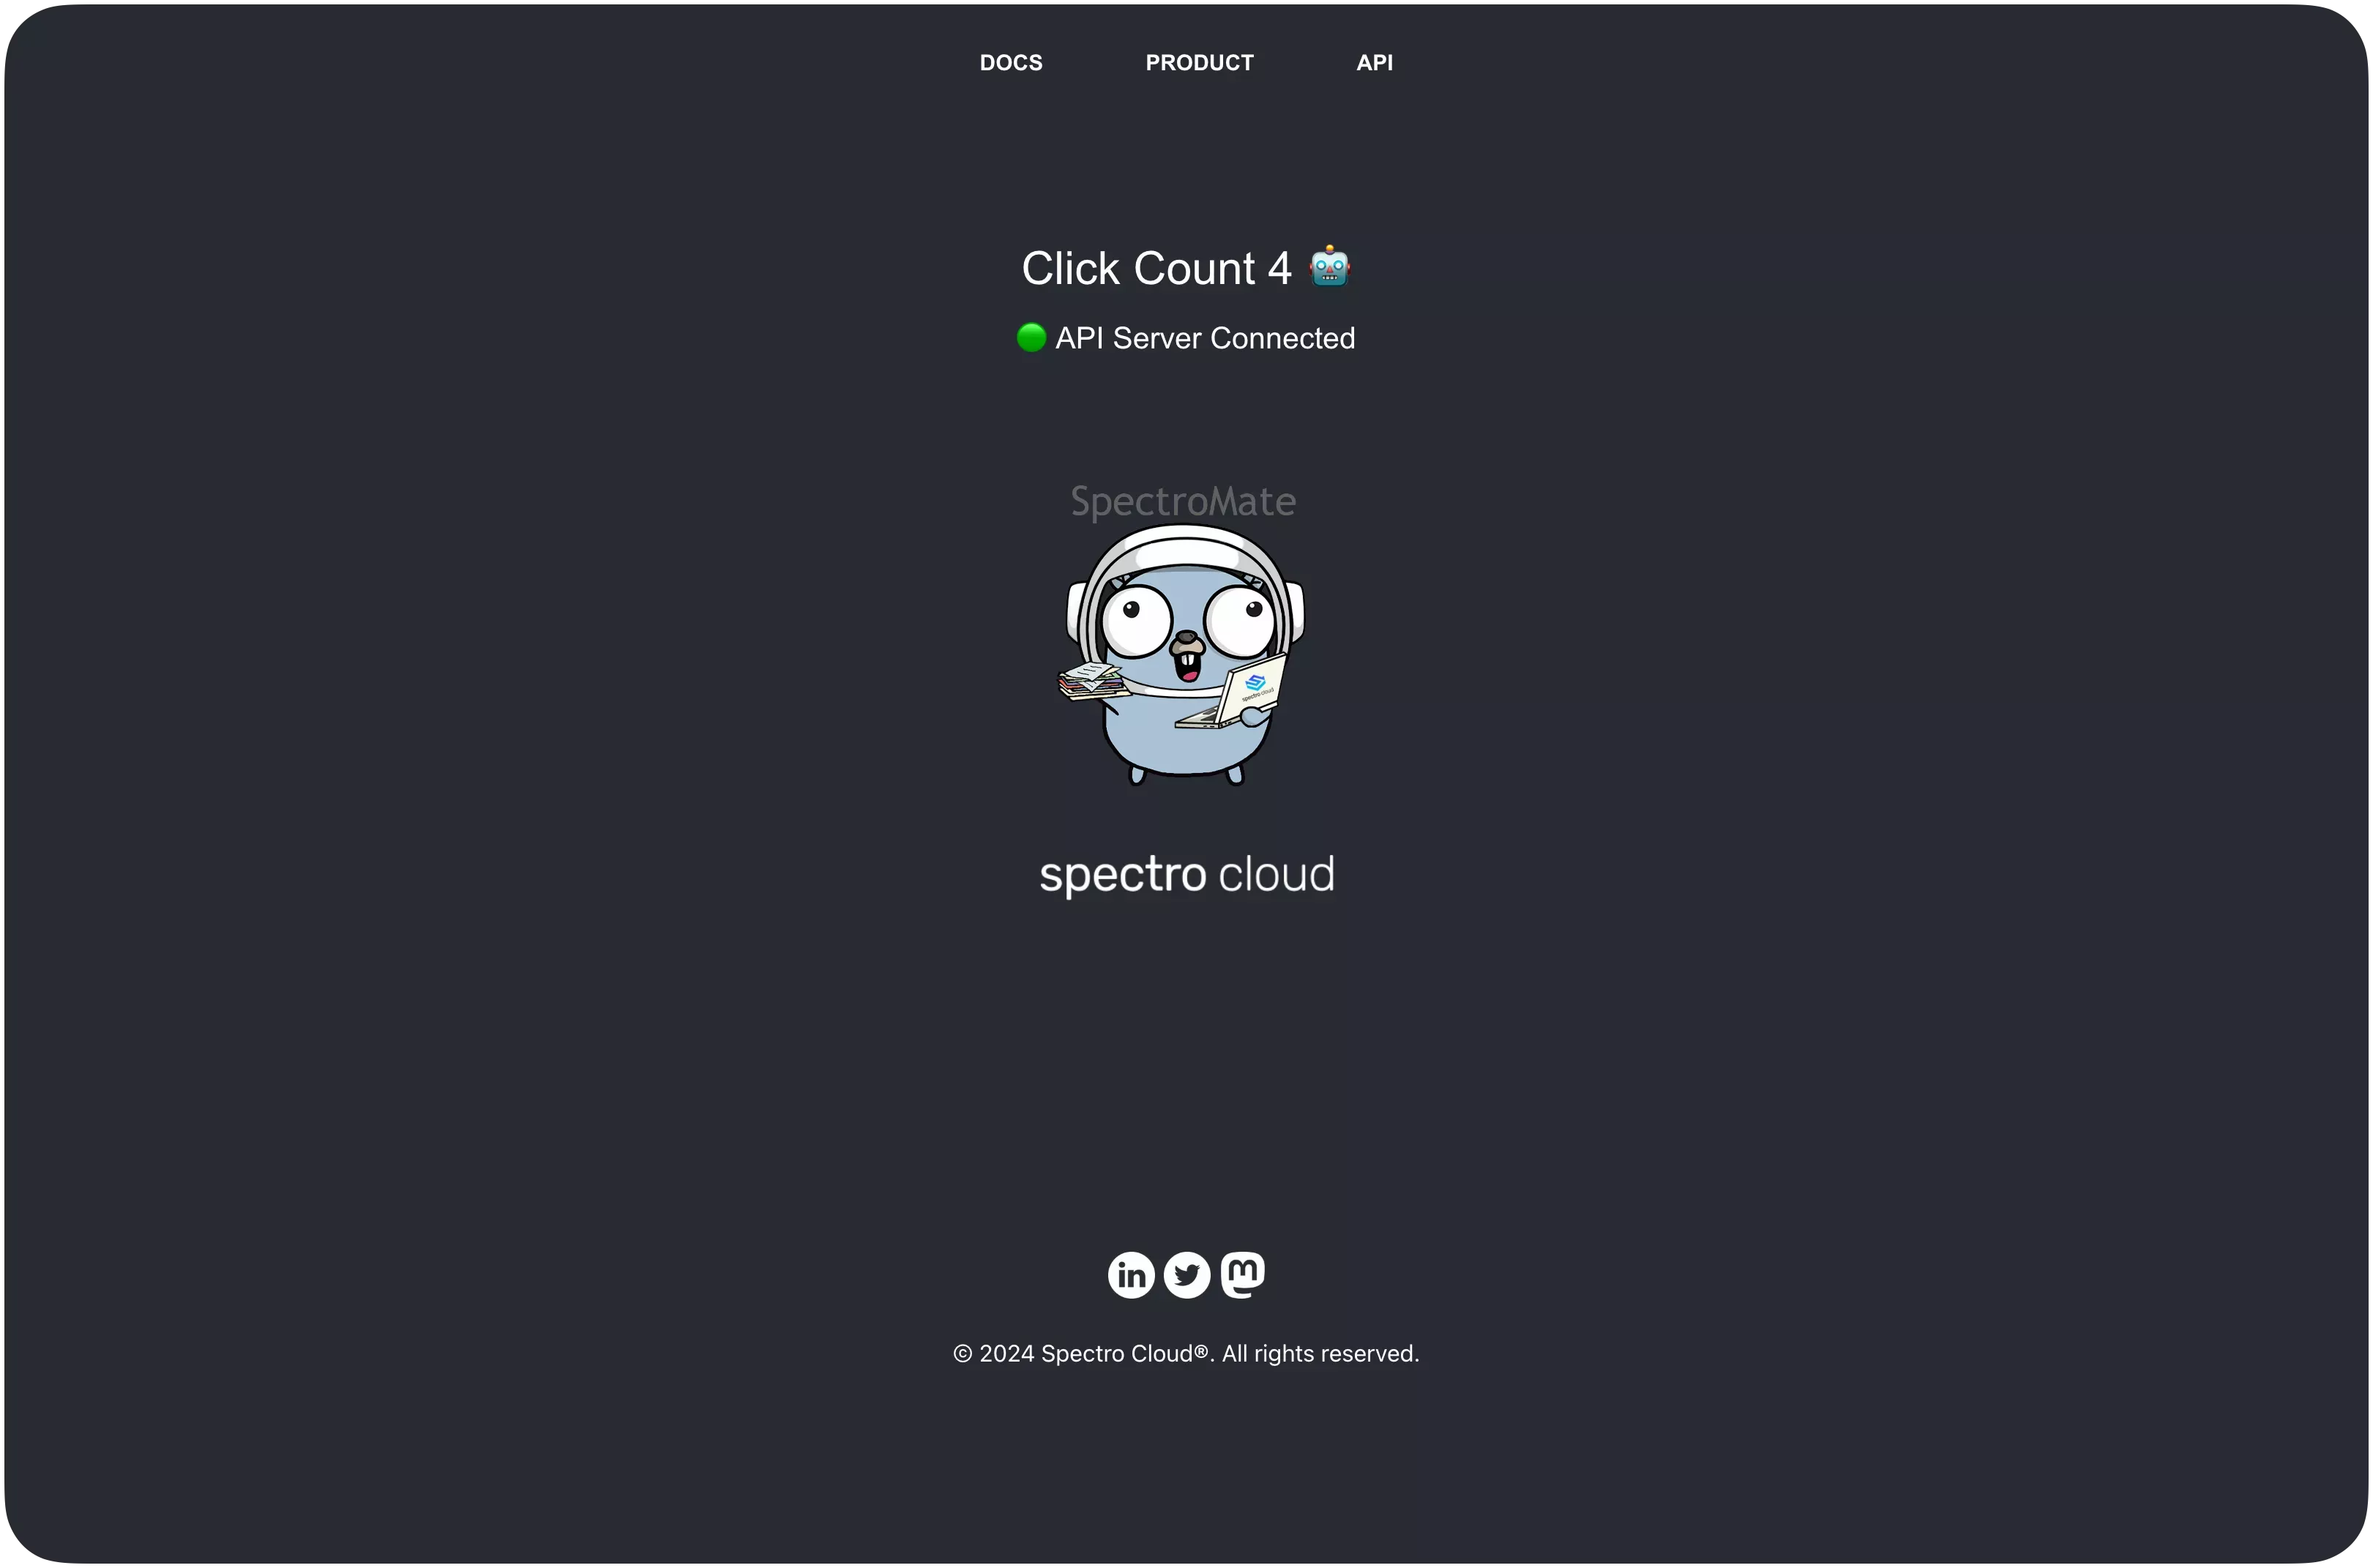
When the Hello Universe application is deployed and ready for network traffic, Palette exposes the service URL in the Services field. Click on the URL for port :8080 to access the application landing page.
Welcome to Hello Universe, an application that helps you learn more about Palette and its features. Feel free to click on the logo to increase the global counter and for a fun image change.
Clean Up
You have successfully provisioned an Edge cluster with a three-tier demo application. Use the following steps to remove the resources created for this tutorial.
Cluster and Cluster Profile
To remove the Edge cluster, log in to Palette and click Clusters from the left Main Menu. Click on the cluster named edge-vbox-cluster to access its details page.
Next, click Settings and select Delete Cluster.
Type in the cluster name to proceed with the deletion. This process may take several minutes to complete.
If a cluster remains in the delete phase for over 15 minutes, it becomes eligible for a force delete. To trigger a force delete, navigate to the cluster’s details page, click on Settings, then select Force Delete Cluster. Palette automatically removes clusters stuck in the cluster deletion phase for over 24 hours.
After deleting your Edge cluster, proceed with the cluster profile deletion.
Click Profiles from the left Main Menu. Select the edge-vbox-profile cluster profile, and then click on the three-dot Menu to display the Delete button. Click Delete and confirm the selection to remove the cluster profile.
Edge Host
Once the Edge cluster and cluster profile are deleted, click Clusters from the left Main Menu.
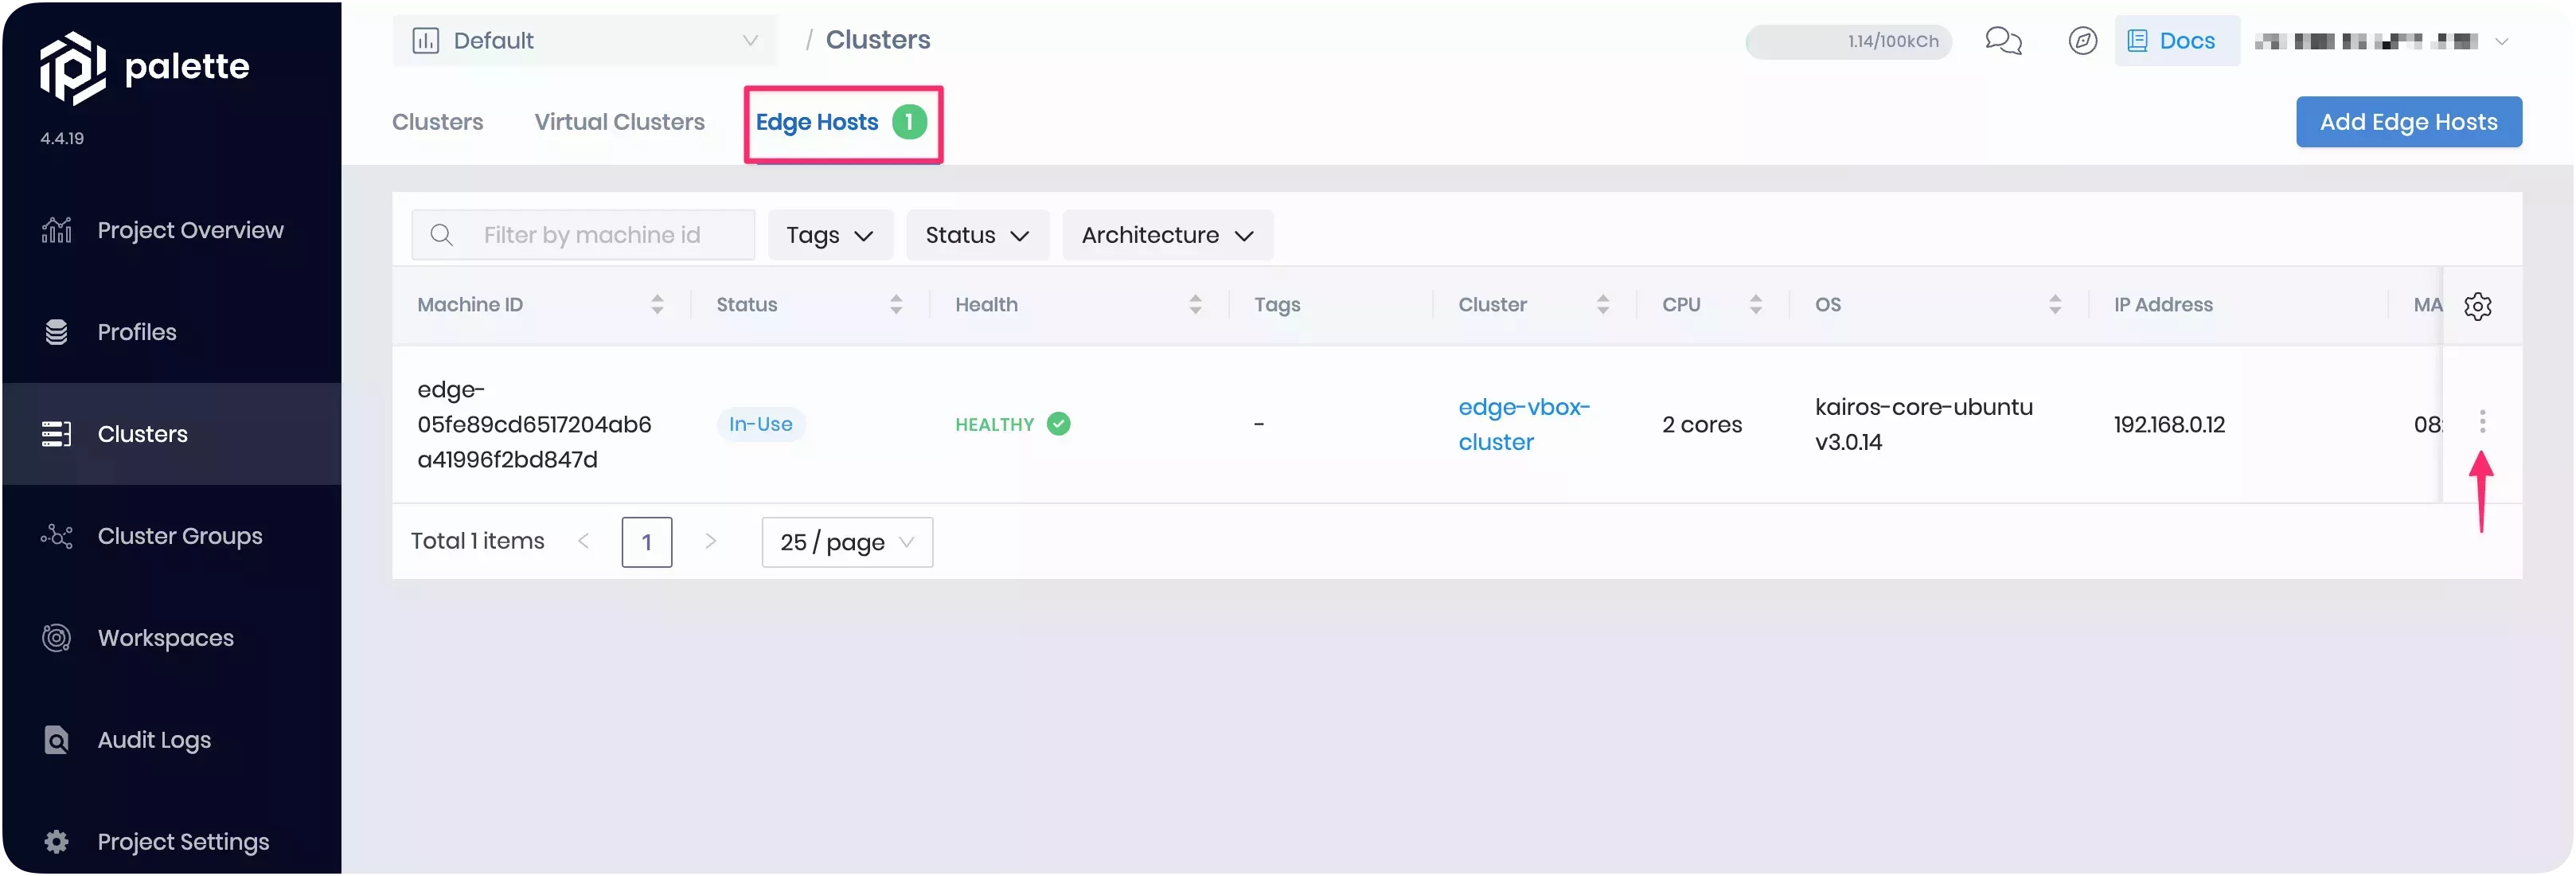
Locate the Edge host deployed in the Register Edge Host section of this tutorial. Click on the three-dot Menu and select Delete to delete the Edge host. Confirm the deletion by clicking OK. This will remove the Edge host from Palette but not delete the underlying infrastructure.
To delete the VM, open the VirtualBox application on your host machine.
Right-click the edge-vm VM and select Stop. Then, click Power Off to turn the machine off.
Next, right-click the VM again and select Remove. Click Delete all files to delete the VM and its hard disk.
Edge Artifacts
Delete the Edge Installer ISO image and its checksum by issuing the following commands from the CanvOS/ directory.
rm build/palette-installer.iso
rm build/palette-installer.iso.sha256
Next, delete the provider images.
docker rmi ttl.sh/ubuntu:k3s-1.29.6-v4.4.12-vbox-tutorial
docker rmi ttl.sh/ubuntu:k3s-1.29.6-v4.4.12-vbox-tutorial_linux_amd64
Wrap-up
In this tutorial, you successfully deployed a single-node Edge cluster along with a demo application using a VirtualBox VM as the Edge host. You learned how to build and test Edge artifacts, prepare an Edge host, and use it to deploy an Edge cluster.
Palette Edge enables you to customize your Edge hosts with the desired OS, Kubernetes distribution, dependencies, and user data configurations.
This tutorial has provided you with hands-on experience with Palette Edge using a single VM, eliminating the need for a complex lab environment or separate physical devices. You can also use this setup to test and validate Edge configurations before deploying them in production.
We encourage you to check the reference resources below to learn more about Palette Edge.